Hyundai Santa Fe (TM): Body (Interior and Exterior) / Front End Module
Front Bumper Beam Assembly. Components and components location
| Components Location |
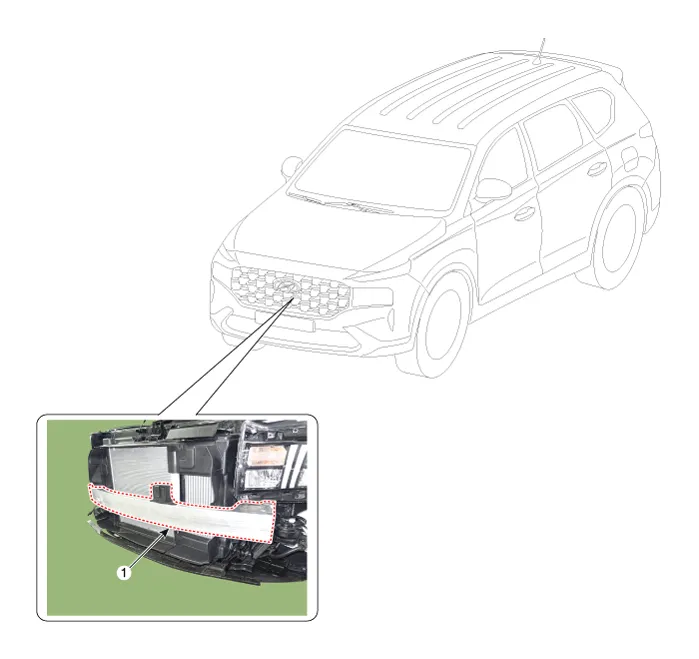
| 1. Front bumper
beam assembly |
Front Bumper Beam Assembly. Repair procedures
| Replacement |
|

| 1. |
Disconnect the battery (-) terminal.
|
| 2. |
Remove the front bumper assembly.
(Refer to Front Bumper - "Front Bumper Assembly")
|
| 3. |
Remove the front radar unit.
(Refer to Advanced Driver Assistance System (ADAS) - "Front Radar Unit")
|
| 4. |
Disconnect the connector (A) and then remove the ambient temperature
sensor (B).
|
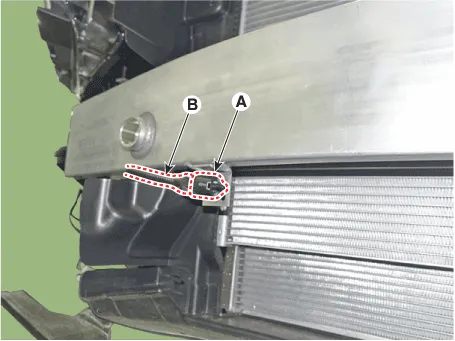
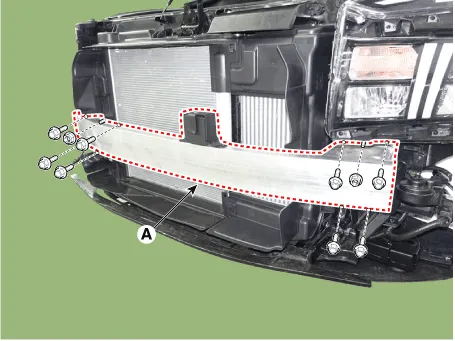
| 5. |
Loosen the bolts, nuts and remove the front bumper beam assembly (A).
|
| 6. |
To install, reverse removal procedure.
|
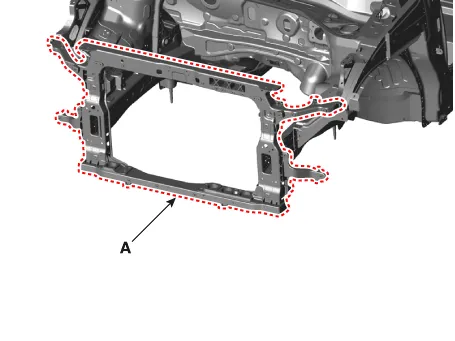
Carrier Assembly. Components and components location
| Components Location |
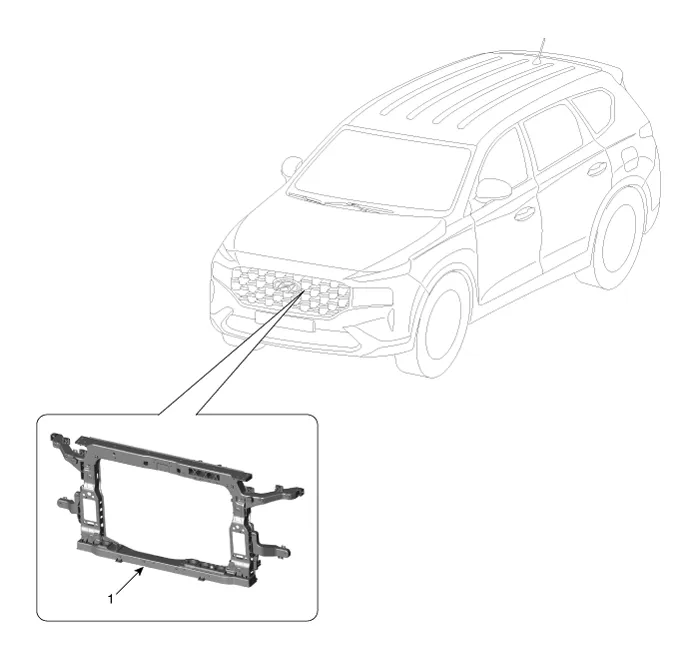
| 1. Carrier assembly |
Carrier Assembly. Repair procedures
| Replacement |
|
| 1. |
Disconnect the battery (-) terminal.
|
| 2. |
Disconnect the water cooled intercooler inlet hose and then drain the
water cooled intercooler coolant.
(Refer to Engine Mechanical System - "Coolant")
|
| 3. |
Recover the refrigerant with a recovery/recycling/charging station.
(Refer to Heating, Ventilation and Air Conditioning - "Air Conditioning
System (Repair procedures)")
|
| 4. |
Remove the front impact sensor connectors.
(Refer to Restraint (AUTOLIV(Depowered)) - "Front Impact Sensor (FIS)")
|
| 5. |
Remove the front bumper assembly.
(Refer to Front Bumper - "Front Bumper Assembly")
|
| 6. |
Remove the head lamps.
(Refer to Body Electrical System - "Head Lamps")
|
| 7. |
Remove the air cleaner.
(Refer to Engine Mechanical System - "Air Cleaner")
|
| 8. |
Remove the horn.
(Refer to Body Electrical System - "Horn")
|
| 9. |
Remove the front bumper beam assembly.
(Refer to Front End Module - "Front Bumper Beam Assembly")
|
| 10. |
Remove the condenser.
(Refer to Heating, Ventilation And Air Conditioning - "Condenser")
|
| 11. |
Remove the radiator.
(Refer to Engine Mechanical System - "Radiator")
|
| 12. |
After loosening the mounting bolts, remove the front end module carrier
assembly (A).
|
| 13. |
To install, reverse removal procedure.
|
Repair procedures Replacement • Put on gloves to prevent hand injuries.
Components and components location Components 1. Front bumper side bracket [LH] 2. Front bumper side bracket [RH] 3.
Other information:
Hyundai Santa Fe (TM) 2019-2023 Service and Repair Manual: Windshield Wiper/Washer
Components and components location Component Location 1. Windshield wiper arm & blade 2. Wiper & washer switch 3. Windshield washer hose 4. Windshield wiper motor & linkage 5. Washer motor 6.
Hyundai Santa Fe (TM) 2019-2023 Service and Repair Manual: Auto Defogging Sensor. Repair procedures
Inspection To inspect and diagnose the sensor, refer to Self-Diagnosis procedure and DTC guide. Replacement 1. Disconnect the negative (-) battery terminal. 2. Remove the rain sensor inner cover (A) and rain sensor cover (B).
Categories
- Manuals Home
- Hyundai Santa Fe Owners Manual
- Hyundai Santa Fe Service Manual
- Troubleshooting
- Engine Electrical System
- Driving your vehicle
- New on site
- Most important about car
