Hyundai Santa Fe (TM): Body (Interior and Exterior) / Front Bumper
Components and components location
| Components |

| 1. Front bumper
side bracket [LH] 2. Front bumper side bracket [RH] |
3. Front bumper
assembly |
Front Bumper Assembly. Components and components location
| Component Location |
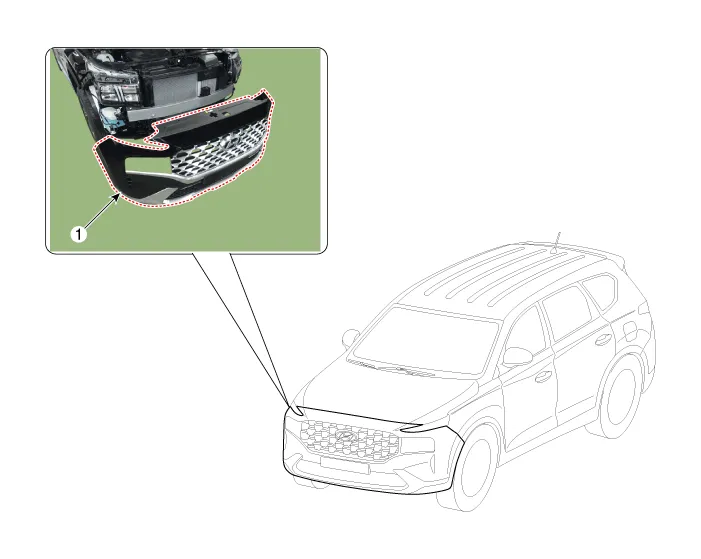
| 1. Front Bumper
Assembly |
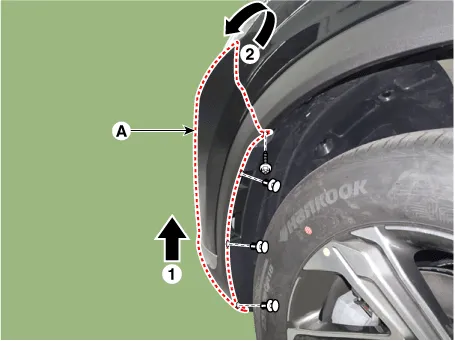
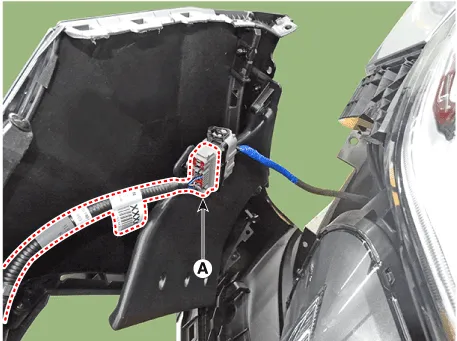
Front Bumper Assembly. Repair procedures
| Replacement |
|

|

| 1. |
Loosen the front bumper upper mounting clips.
|

| 2. |
Loosen the front bumper lower mounting clips.
|
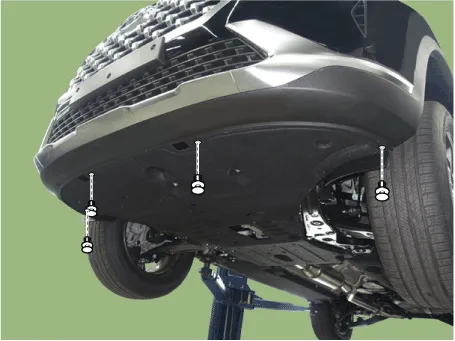
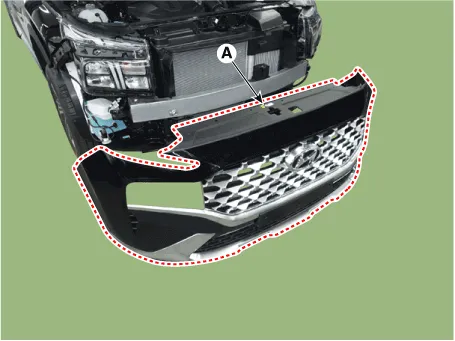
| 3. |
Loosen the mounting clis and screws on the side of front bumper (A),
detach the side part of front bumper.
|
| 4. |
Press the lock pin and separate the front bumper main connector (A).
|
| 5. |
Remove the front bumper assembly (A).
|
| 6. |
To install, reverse removal procedure.
|

Radiator Grill. Components and components location
| Component Location |
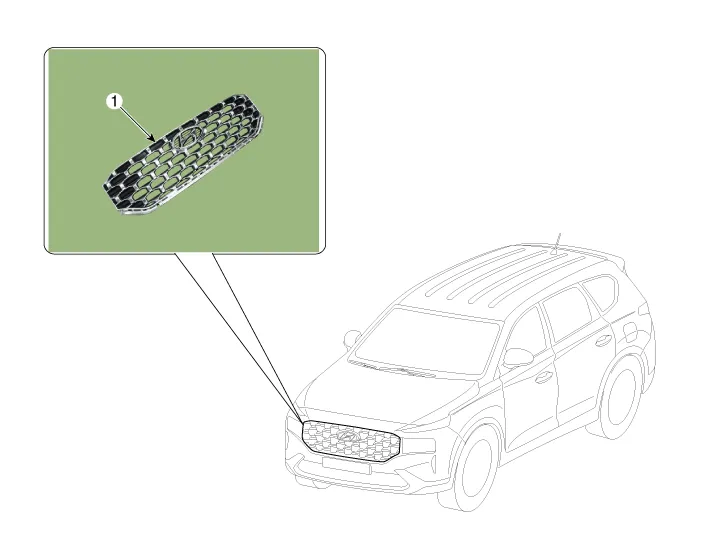
| 1. Radiator Grill |
Radiator Grill. Repair procedures
| Replacement |
|
|
| 1. |
Remove the front bumper assembly.
(Refer to Front Bumper - "Front Bumper Assembly")
|
| 2. |
Remove the front bumper energy absorber (A).
|
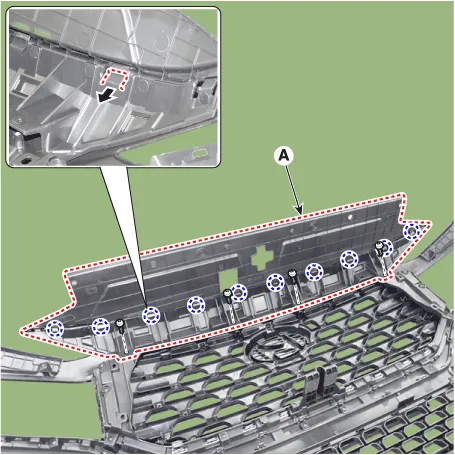
| 3. |
After loosening the mounting screws, remove the front bumper upper cover
(A).
|
| 4. |
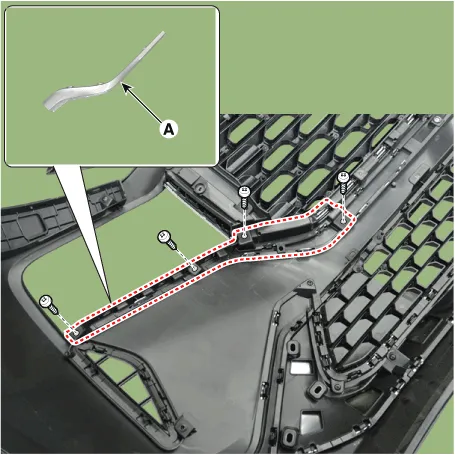
Loosen the mounting screws, remove the side front bumper molding (A).
|
| 5. |
Loosen the mounting screws, remove the license plate bracket (A).
|

| 6. |
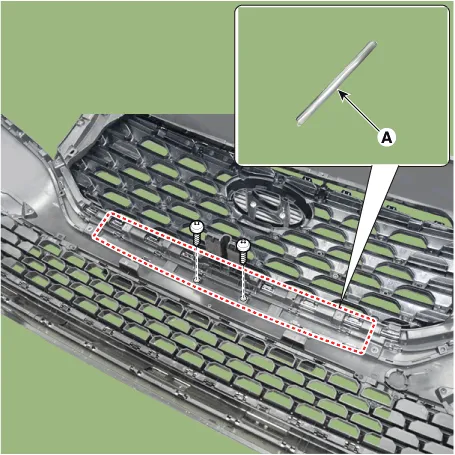
Loosen the mounting screws, remove the center front bumper molding (A).
|
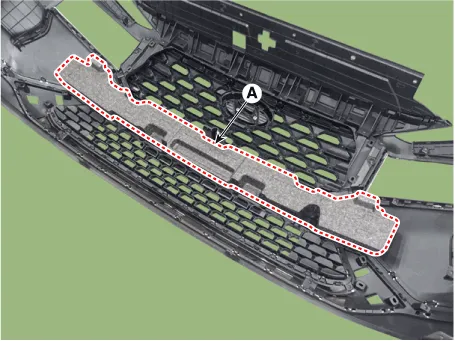
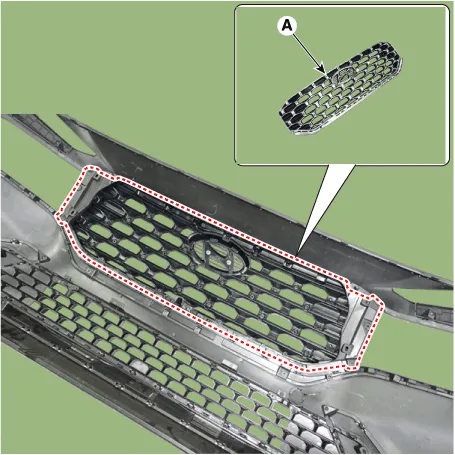
| 7. |
After loosening the mounting screws, remove the radiator grill (A).
|
| 8. |
To install, reverse removal procedure.
|
Front Bumper Beam Assembly. Components and components location Components Location 1. Front bumper beam assembly Front Bumper Beam Assembly.
Components and components location Components 1. Rear Bumper Side Under Cover 2. Rear Bumper Side Bracket 3.
Other information:
Hyundai Santa Fe (TM) 2019-2023 Service and Repair Manual: Rear Wiper/Washer
Components and components location Component Location 1. Rear wiper arm nut 2. Rear wiper arm & blade 3. Rear wiper grommet 4. Rear wiper motor assembly Rear Wiper Motor. Repair procedures Inspection Rear Wiper Motor 1.
Hyundai Santa Fe (TM) 2019-2023 Service and Repair Manual: Condenser. Repair procedures
Inspection 1. Check the condenser fins for clogging and damage. If clogged, clean them with water, and blow them with compressed air. If bent, gently bend them using a screwdriver or pliers. 2.
Categories
- Manuals Home
- Hyundai Santa Fe Owners Manual
- Hyundai Santa Fe Service Manual
- Front Radar Unit. Repair procedures
- Tire Pressure Monitoring System (TPMS)
- Rear Disc Brake. Repair procedures
- New on site
- Most important about car
