Hyundai Santa Fe (TM): Engine Mechanical System / Lubrication System
Engine Oil. Repair procedures
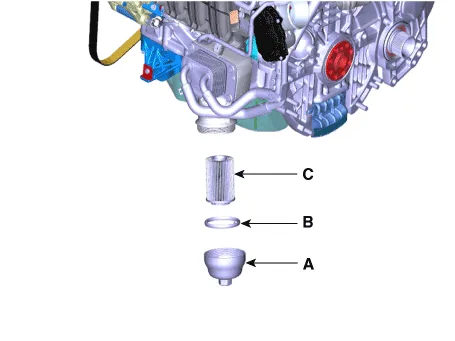
| Oil and filter replacement |
|

|
| 1. |
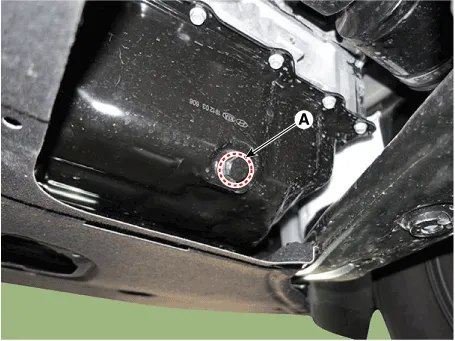
Drain the engine oil.
|


| 2. |
Replace the oil filter.
|


| 3. |
Refill with the engine oil.
|
| 4. |
Start engine and check for oil leaks.
|
| 5. |
Recheck the engine oil level.
|
| Inspection |
| 1. |
Check the engine oil quality.
Check the oil deterioration, entry of water, discoloring of thinning.
If the quality is visibly poor, replace the oil.
|
| 2. |
Check the engine oil level.
After engine warm up stop the engine wait 15 minutes then check the
oil level. Oil level should be between the "L" and "F" marks on the
dipstick. If low check for leakage and add oil up to the "F" mark.
|
| – |
Middle East : 5W-30 ACEA A5/B5 or 0W-30 ACE C2
|
| – |
EUROPE : 0W-20 API LATEST(SN PLUS) or ACEA C5
|
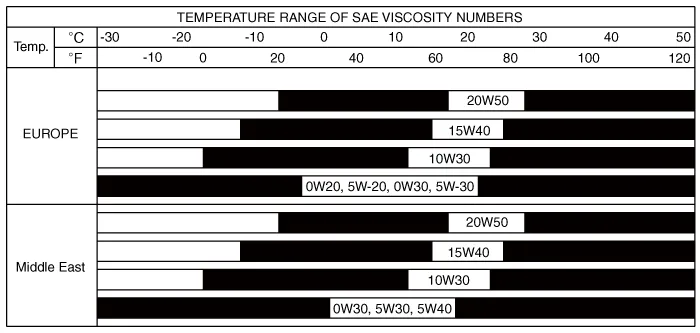
For best performance and maximum protection of all types of operation,
select only those lubricants which :
|
Balance Shaft Module. Repair procedures
| Removal |
|
| 1. |
Remove the oil pump.
(Refer to Lubrication System - "Oil Pump")
|
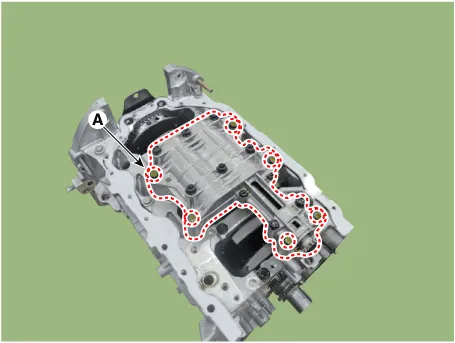
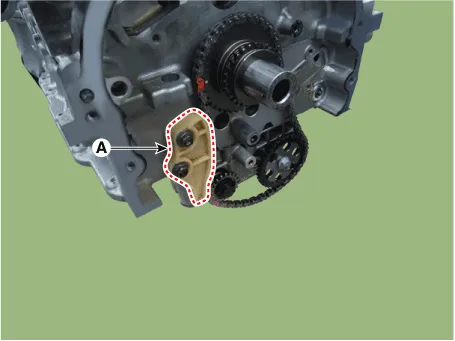
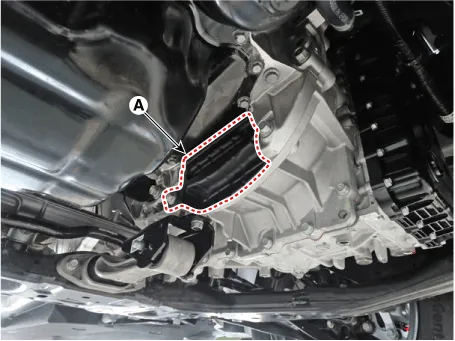
| 2. |
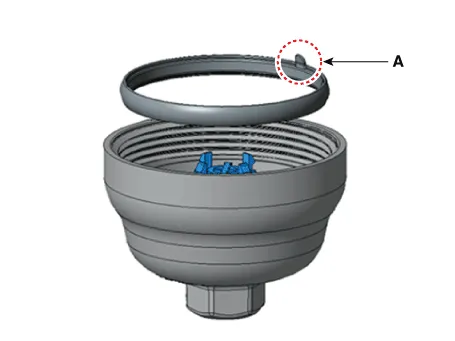
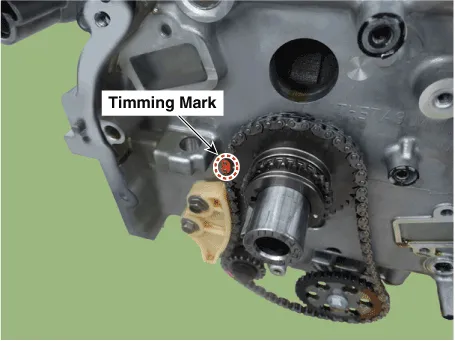
Remove the balance shaft module (A).
|
| Installation |
| 1. |
Install the balance shaft module (A).
|
| 2. |
Install the oil pump.
(Refer to Lubrication System - "Oil Pump")
|
Oil Pump. Repair procedures
| Removal |
|
| 1. |
Remove the timing chain.
(Refer to Timing System - "Timing Chain")
|
| 2. |
Remove the oil pump chain tensioner (A).
|
| 3. |
Remove the oil pump chain guide (A).
|
| 4. |
Remove the oil pump chain (A).
|

| 5. |
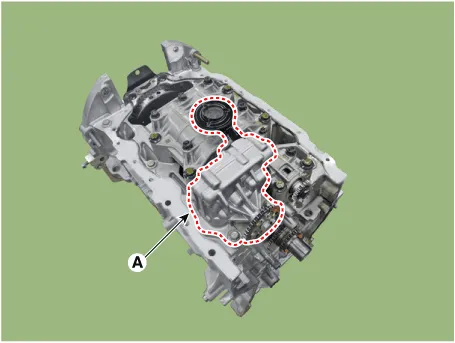
Remove the oil pump (A).
|
| Installation |
| 1. |
Install the oil pump (A).
|
| 2. |
Install the oil pump chain guide (A).
|
| 3. |
Install the oil pump chain (A).
|
| 4. |
Install the oil pump chain tensioner (A).
|
| 5. |
Install the timing chain.
(Refer to Timing System - "Timing Chain")
|
Oil Pan. Repair procedures
| Removal |
|
| 1. |
Disconnect the battery negative "-" terminal.
|
| 2. |
Remove the drive belt.
(Refer to Timing System - "Drive Belt")
|
| 3. |
Disconnect the compressor ECV connector, and then by loosening the mounting
bolts, widen the gap between the compressor from the engine to remove
the A/C compressor bracket.
(Refer to Air Conditioning System - "Compressor")
|
| 4. |
Remove the A/C compressor bracket (A).
|
| 5. |
Remove the dust cover (A).
|
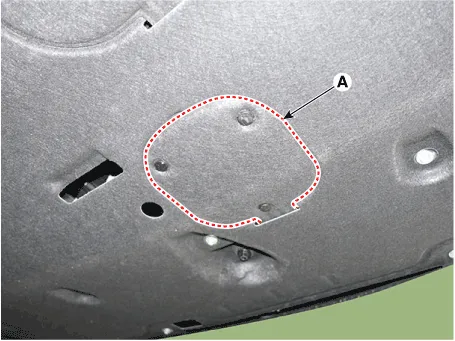
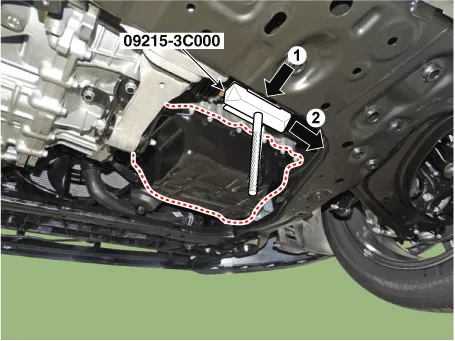
| 6. |
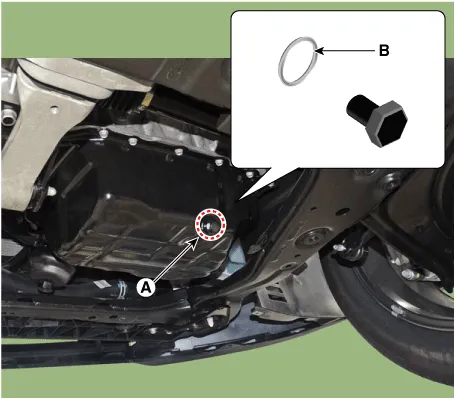
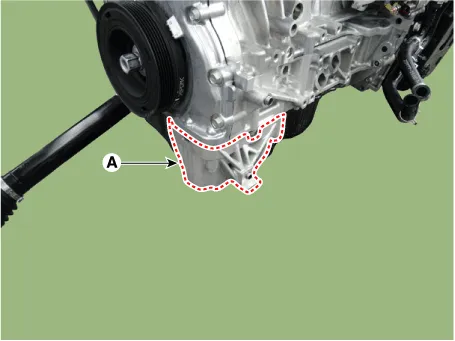
Remove the oil pan (A). Insert the blade of SST (09215-3C000) between
the ladder frame and oil pan. Cut off applied sealer and remove the
lower oil pan.
|
| Installation |
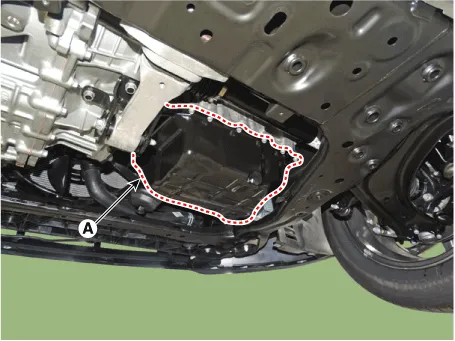
| 1. |
Install the oil pan.
|
| 2. |
Install the A/C compressor bracket (A).
|
| 3. |
Install the A/C compressor mounting bolts.
(Refer to Heateng, Ventilation, Air conditioning - "Compressor")
|
| 4. |
Refill engine with engine oil.
|
Oil Pressure Switch. Repair procedures
| Removal and Installation |
|
| 1. |
Remove the engine room under cover.
(Refer to Engine and Transaxle Assembly - "Engine Room Under Cover")
|
| 2. |
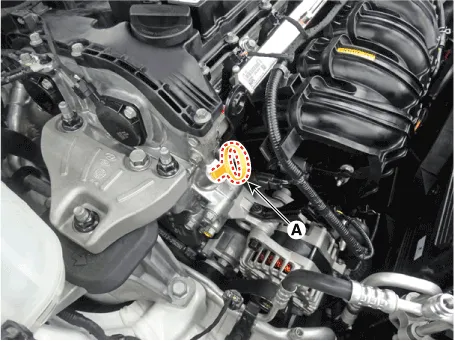
Remove the intake manifold stay.
|
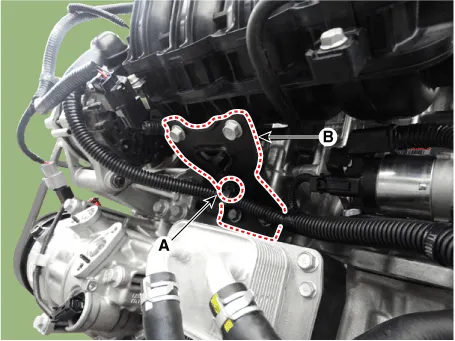
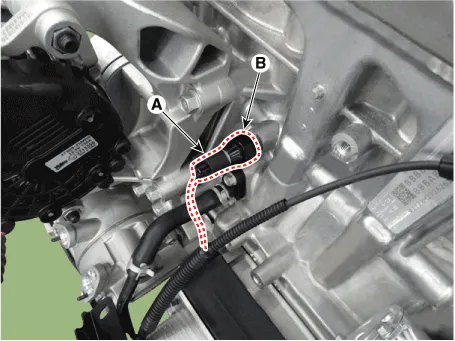
| 3. |
Disconnect the oil pressure switch connector (A) and then remove the
oil pressure switch (B).
|
| 4. |
Install in the reverse order of removal.
|
| Inspection |
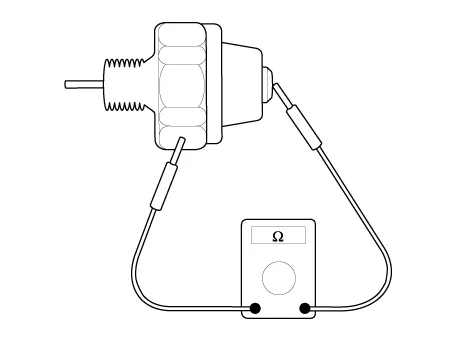
| 1. |
Check the continuity between the terminal and the body with an ohmmeter.
If there is no continuity, replace the oil pressure switch.
|

| 2. |
Check the continuity between the terminal and the body when the fine
wire is pushed. If there is continuity even when the fine wire is pushed,
replace the switch.
|
| 3. |
If there is no continuity when a 50kPa (0.50kgf/cm², 7.25psi) is applied
through the oil hole, the switch is operaing properly.
Check for air leakage. If air leaks, the diaphragm is broken. Replace
it.
|
Oil Level Gauge & Pipe. Repair procedures
| Removal and Installation |
|
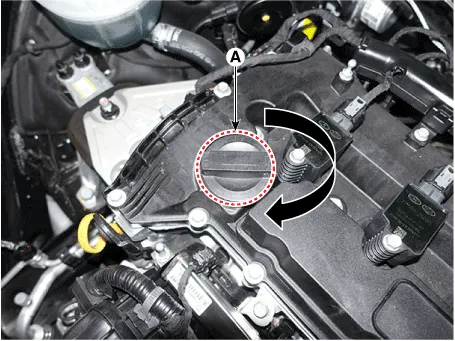
| 1. |
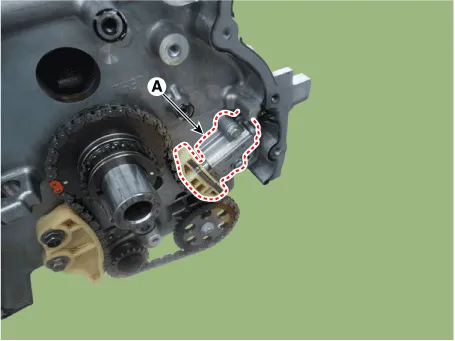
Remove the oil level gauge (A).
|
| 2. |
Remove the timing chain cover.
(Refer to Timing System - "Timing Chain Cover")
|
| 3. |
Remove the oil level pipe (A).
|
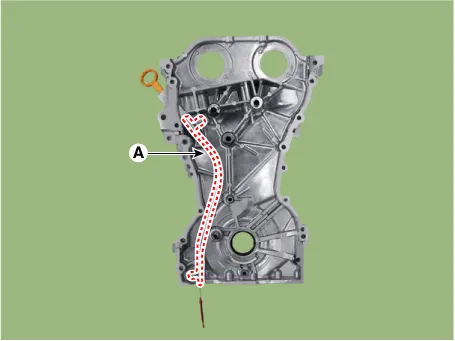
| 4. |
Install in the reverse order of removal.
|
Oil Filter & Oil Cooler. Repair procedures
| Removal and Installation |
|
| 1. |
Drain the engine oil.
(Refer to Lubrication System - "Engine Oil")
|
| 2. |
Drain the coolant.
(Refer to Cooling System - "Coolant")
|
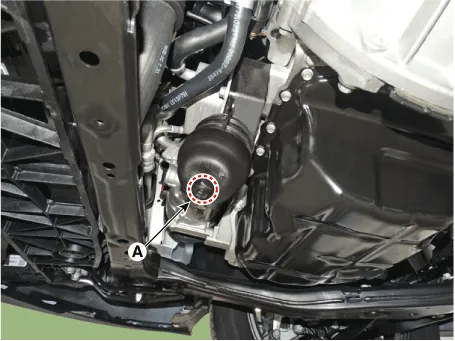
| 3. |
Disconnect the oil cooler hoses (A).
|
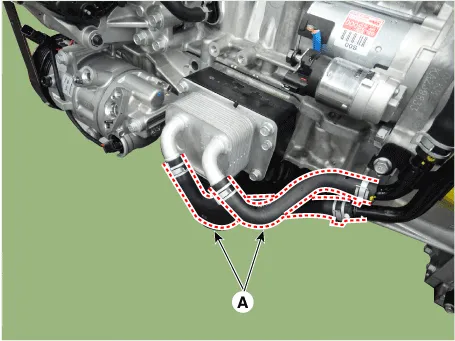
| 4. |
Remove the oil filter & oil cooler (A).
|
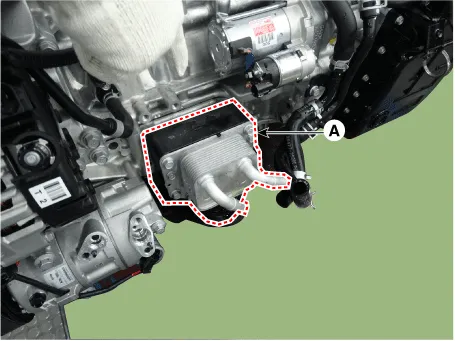
| 5. |
Install in the reverse order of removal.
|
| 6. |
Fill with engine coolant.
(Refer to Cooling System - "Coolant")
|
| 7. |
Refill engine oil.
(Refer to Lubrication System - "Engine Oil")
|
| 8. |
Start engine and check for leaks.
|
Coolant. Repair procedures Refilling And Bleeding • Never remove the reservoir tank cap when the engine is hot.
Air Cleaner. Repair procedures Removal and Installation Air Cleaner Assembly 1. Disconnect the battery negative terminal.
Other information:
Hyundai Santa Fe (TM) 2019-2023 Service and Repair Manual: Electro Chromic Inside Rear View Mirror
Description and operation Description The ECM (Electro Chromatic inside rear view Mirror) is intended dim the reflecting light in the rear view mirror. The forward facing sensor detects brightness of the surroundings, while the rearward looking sensor is for the light from the rear.
Hyundai Santa Fe (TM) 2019-2023 Service and Repair Manual: Button Engine Start System
Description and operation Description System Overview The System offers the following features: – Changing the state of engine ignition and power by using the start button. – Controlling external relays for ACC / IGN1 / IGN2 terminal switching and STARTER, without use
Categories
- Manuals Home
- Hyundai Santa Fe Owners Manual
- Hyundai Santa Fe Service Manual
- LCD Display
- Engine Electrical System
- Auto Hold. Warning messages
- New on site
- Most important about car
