Hyundai Santa Fe (TM): Hydraulic System / SS-A Solenoid Valve (ON/OFF). Repair procedures
| Inspection |
|

| Removal |
|

| 1. |
Turn ignition switch OFF and disconnect the negative (-) battery cable.
|
| 2. |
Remove the air duct and the air cleaner assembly.
(Refer to Engine Mechanical System - "Air Cleaner")
|
| 3. |
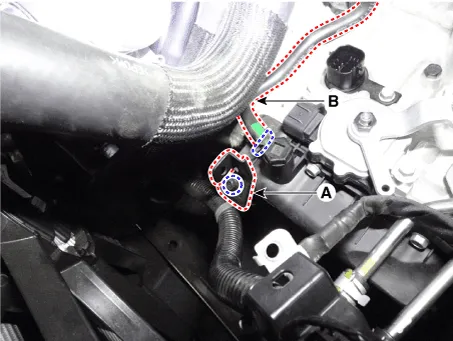
Separate the air bleed hose (B) and then wiring bracket (A).
|
| 4. |
Remove the under cover.
(Refer to Engine Mechanical System - "Engine Room Under Cover")
|
| 5. |
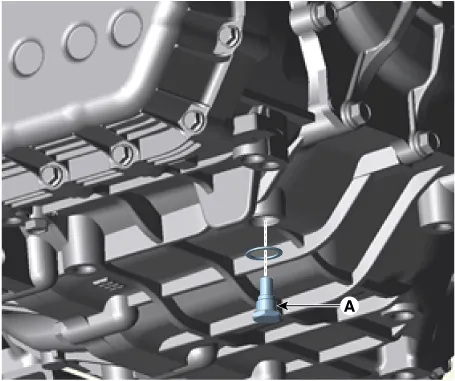
Remove the drain plug (A) and reinstall the drain plug after draining
ATF totally.
|
| 6. |
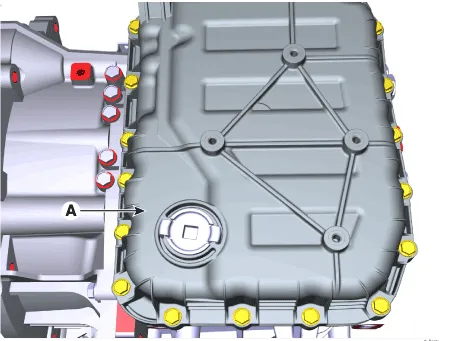
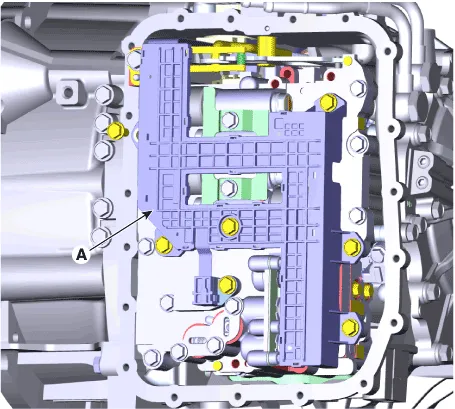
Loosen the mounting bolts (A) of the valve body cover.
|
| 7. |
Loosen the bolts and then removing the main harness (A).
|
| 8. |
Loosen the support bracket mounting bolts (A).
|
| 9. |
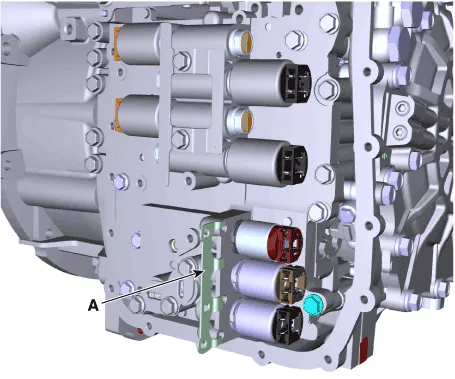
Remove the support bracket (A).
|
| 10. |
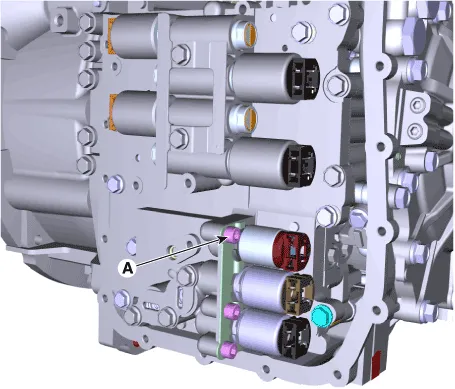
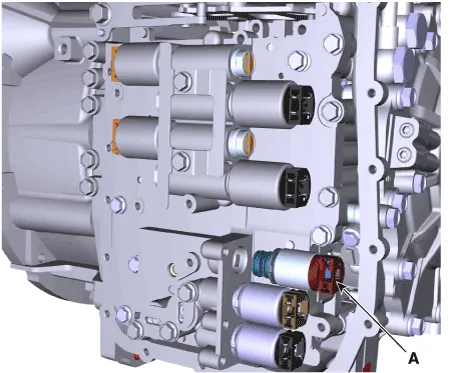
Remove the ON/OFF solenoid valve (A).
|
| Installation |
| 1. |
To install, reverse the removal procedure.
|
| 2. |
Inject the automatic transaxle oil and inspect the oil level.
(Refer to Automatic Transaxle System - "Automatic Transaxle Fluid")
|
| 3. |
Clear the diagnostic trouble codes (DTC) using the diagnostic tool.
(Refer to Automatic Transaxle System - "Automatic Transaxle")
|
| 4. |
In order to prevent start delay and gear shift shock during acceleration
and start, perform TCM learning after replacing the solenoid valve.
(Automatic Transaxle Control System - "Repair Procedures")
|
Specifications ▷ Control type : Normally low type Shape Items Specifications Control voltage [V] 9 - 16 Supply pressure [kpa (kgf/cm², psi)] 490.
Description and operation Description • Engine coolant is used for circulating heat in order to heat and cool the transaxle oil.
Other information:
Hyundai Santa Fe (TM) 2019-2023 Service and Repair Manual: Components and components location
Component Location (1) 1. Integrated Body Control Unit (IBU) 2. Buzzer 3. Door outside handle 4. Interior antenna 2 5. Door module antenna 6. Interior antenna 1 Component Location (2) 1.
Hyundai Santa Fe (TM) 2019-2023 Service and Repair Manual: Smart Key. Repair procedures
Smart Key Smart Key Code Saving 1. Connect the DLC cable of diagnostic tool to the data link connector (16 pins) in driver side crash pad lower panel, turn the power on diagnostic tool. 2.
Categories
- Manuals Home
- Hyundai Santa Fe Owners Manual
- Hyundai Santa Fe Service Manual
- Emission Control System
- Automatic Transaxle Control System
- Battery. Specifications
- New on site
- Most important about car
