Hyundai Santa Fe: Quarter Fixed Glass / Repair procedures
Hyundai Santa Fe (TM) 2019-2025 Service Manual / Body (Interior and Exterior) / Quarter Fixed Glass / Repair procedures
| Replacement |
[Removal]
|
|
| 1. |
Remove the rear pillar trim.
(Refer to Interior Trim - "Rear Pillar Trim")
|
| 2. |
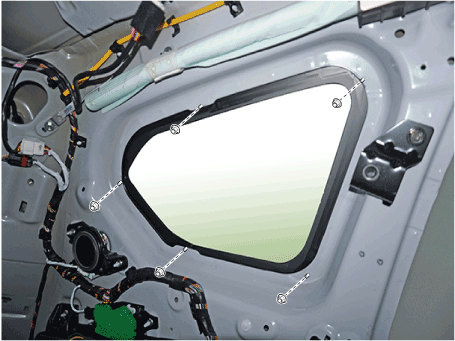
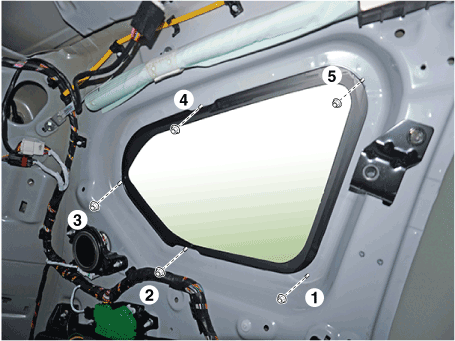
Loosen the quarter fixed glass mounting nuts.
|
| 3. |
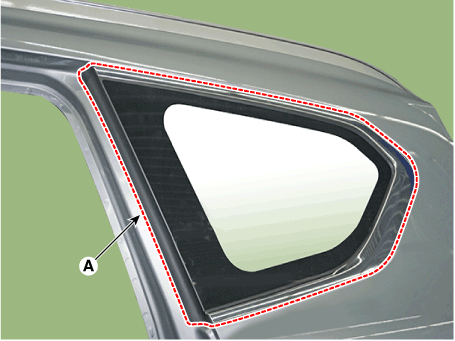
Cut out the quarter fixed glass sealant using the utility knife.
|
| 4. |
Remove the quarter fixed glass (A).
|
[Installtion]
| 1. |
With a putt knife, scrape the old adhesive smooth to a thickness of
about 2mm (0.08 in.) on the bonding surface around the entire quarter
fixed glass flange.
|
| 2. |
Clean the body bonding surface with a sponge dampened in alcohol. After
cleaning, keep the surface away from oil, grease and water.
|
| 3. |
With a sponge, apply a light coat of glass primer along the edge of
the quarter fixed glass, and then lightly wipe it off with a gauze or
cheese cloth.
|
| 4. |
With a sponge, apply a light coat of body primer to the original adhesive
remaining around the flange. Let the body primer dry for at least 10
minutes.
|
| 5. |
Install the quarter fixed glass and nuts.
|
| 6. |
Install the rear pillar trim.
(Refer to Interior Trim - "Rear Pillar Trim")
|
 Floor Carpet
..
Other information:
Hyundai Santa Fe (TM) 2019-2025 Service Manual: Front Seat Belt Pretensioner. Components and components location
..
Hyundai Santa Fe (TM) 2019-2025 Owner's Manual: Changing coolant
We recommend that coolant be changed by an authorized HYUNDAI dealer according to the Maintenance Schedule at the beginning of this chapter. WARNING Do not use engine coolant or antifreeze in the washer fluid reservoir. Engine coolant can severely obscure visibility when sprayed on the windshield and may cause loss of vehicle control resulting in an accident...
Categories
- Manuals Home
- 4th Generation Santa Fe Owners Manual
- 4th Generation Santa Fe Service Manual
- Smart liftgate
- Seat cushion extension adjustment (for driver's seat)
- Troubleshooting
- New on site
- Most important about car
Electric Power Steering (EPS) warning light. Charging system warning light
Electric Power Steering (EPS) warning light
.png)
This warning light illuminates:
When you set the ignition switch or the Engine Start/Stop button to the ON position.- The electric power steering warning light illuminates for about 3 seconds and then goes off. Whenever there is a malfunction with the electric power steering.
If this occurs, have the vehicle inspected by an authorized HYUNDAI dealer.
Copyright © 2025 www.hsafe4.com


