Hyundai Santa Fe (TM): Body (Interior and Exterior) / Quarter Fixed Glass
Components and components location
| Components |
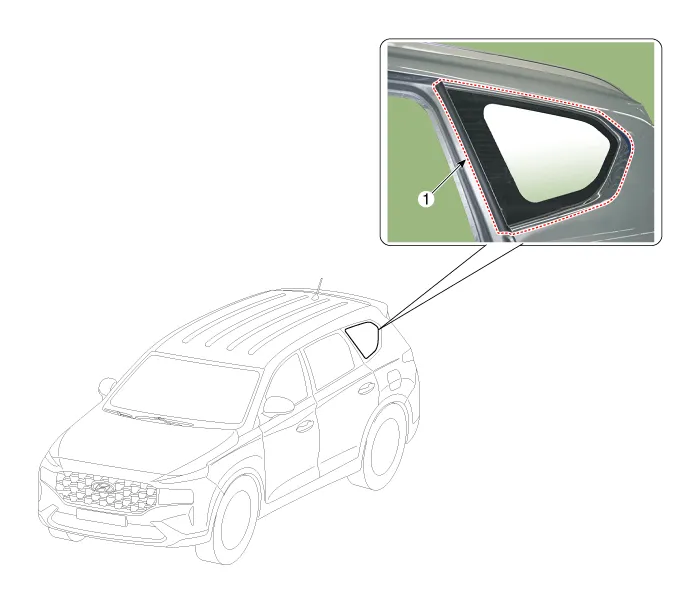
| 1. Quarter Fixed
Glass |
Repair procedures
| Replacement |
|

|

| 1. |
Remove the rear pillar trim.
(Refer to Interior Trim - "Rear Pillar Trim")
|
| 2. |
Loosen the quarter fixed glass mounting nuts.
|
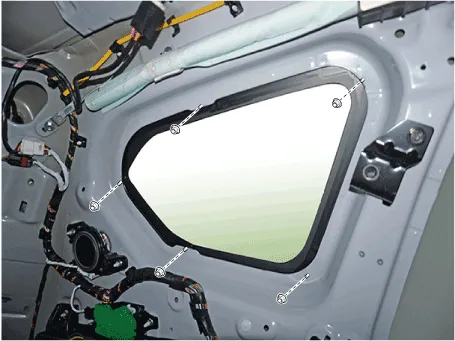
| 3. |
Cut out the quarter fixed glass sealant using the utility knife.
|

| 4. |
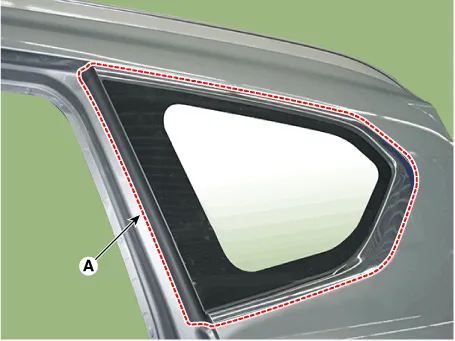
Remove the quarter fixed glass (A).
|
| 1. |
With a putt knife, scrape the old adhesive smooth to a thickness of
about 2mm (0.08 in.) on the bonding surface around the entire quarter
fixed glass flange.
|
| 2. |
Clean the body bonding surface with a sponge dampened in alcohol. After
cleaning, keep the surface away from oil, grease and water.
|
| 3. |
With a sponge, apply a light coat of glass primer along the edge of
the quarter fixed glass, and then lightly wipe it off with a gauze or
cheese cloth.
|
| 4. |
With a sponge, apply a light coat of body primer to the original adhesive
remaining around the flange. Let the body primer dry for at least 10
minutes.
|
| 5. |
Install the quarter fixed glass and nuts.
|
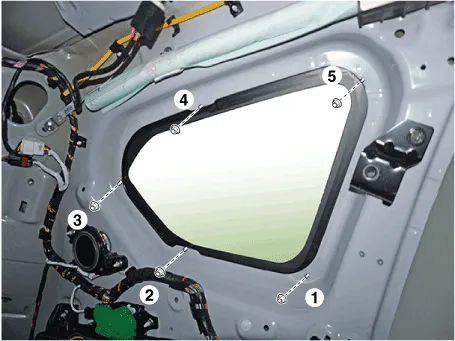
| 6. |
Install the rear pillar trim.
(Refer to Interior Trim - "Rear Pillar Trim")
|
Components and components location Components 1. Tailgate window glass Repair procedures Removal • Put on gloves to prevent hand injuries.
Repair procedures Replacement • Put on gloves to prevent hand injuries.
Other information:
Hyundai Santa Fe (TM) 2019-2023 Service and Repair Manual: Power Door Locks
Components and components location Component Location 1. Driver power window main switch 2. IBU (Integrated Body Control Unit) 3. Door lock switch 4. Tailgate lock actuator & switch 5. Front door lock actuator & switch 6.
Hyundai Santa Fe (TM) 2019-2023 Service and Repair Manual: Ambient Temperature Sensor. Description and operation
Description The ambient temperature sensor is located at the front of the condenser and detects ambient air temperature. It is a negative type thermistor; resistance will increase with lower temperature, and decrease with higher temperature.
Categories
- Manuals Home
- Hyundai Santa Fe Owners Manual
- Hyundai Santa Fe Service Manual
- Emission Control System
- Vehicle auto-shut off. System Operation
- Engine Mechanical System
- New on site
- Most important about car
