Hyundai Santa Fe: Air conditioning System / Refrigerant Line. Repair procedures
Hyundai Santa Fe (TM) 2019-2025 Service Manual / Heating,Ventilation And Air Conditioning / Air conditioning System / Refrigerant Line. Repair procedures
| Replacement |
[Front suction & Liquid pipe assembly]
| 1. |
If a compressor is available, the air conditioner is operated for a
few minutes in the engine idle state and then the engine is stopped.
|
| 2. |
Disconnect the negative (-) battery terminal.
|
| 3. |
Recover the refrigerant with a recovery/charging station.
|
| 4. |
Remove the engine cover.
(Refer to Engine Mechanical System - "Engine Cover")
|
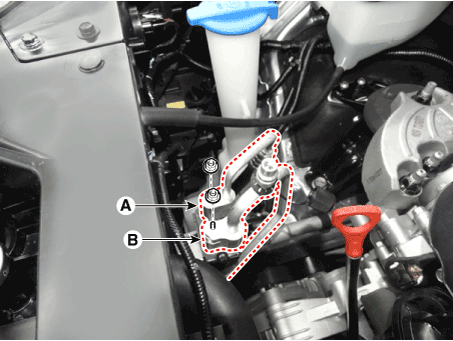
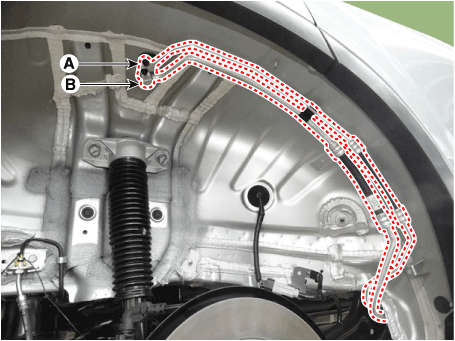
| 5. |
Loosen the mounting bolts and separate the expansion valve (A) fron
evaporator core.
|
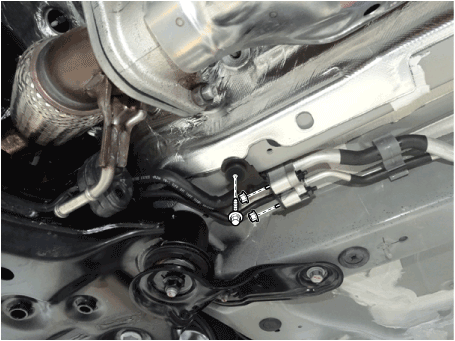
| 6. |
Loosen the mounting nuts and separate the suction line (A), discharge
line (B).
|
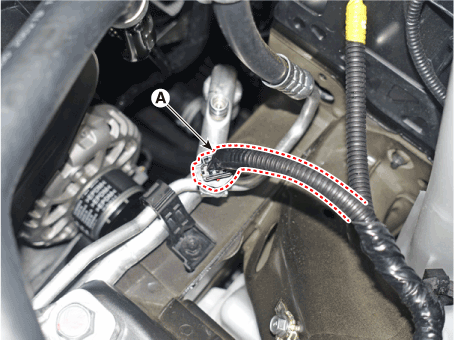
| 7. |
Press the lock pin and separate the APT sensor connector (A).
|
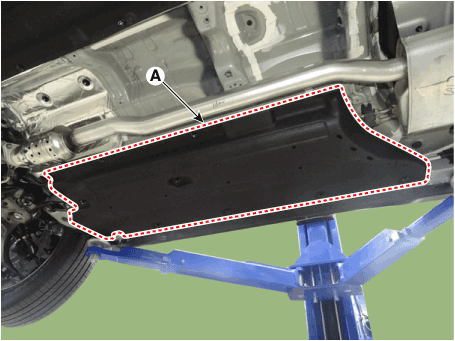
| 8. |
Remove the engine room under cover.
(Refer to Engine Mechanical System - "Engine Room Under Cover")
|
| 9. |
Remove the engine mounting braket.
(Refer to Engine Mechanical System - "Engine Mounting")
|
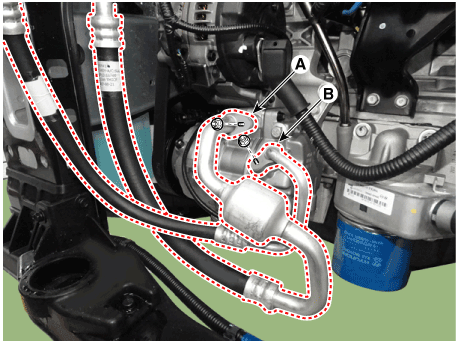
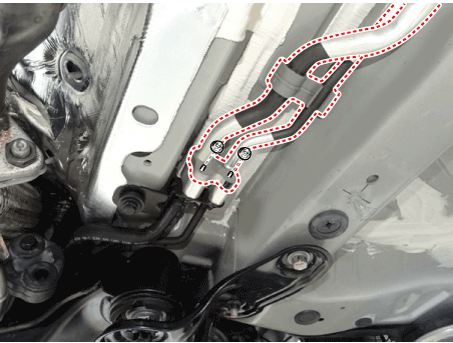
| 10. |
Separate the compressor suction line (A) and discharge line (B) connection
nuts and disconnect the line.
|

| 11. |
Remove the refrigerant pipe line mounting nuts and braket bolt.
|
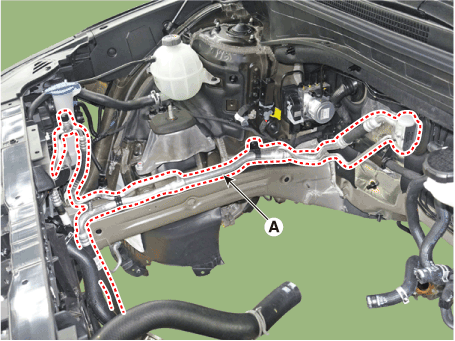
| 12. |
Loosen the mounting bolt and remove the Front suction & Liquid pipe
assembly (A).
|
| 13. |
Install in the reverse order of removal.
|

[Refrigerant Line (Condenser)]
| 1. |
Remove the front bumper assembly.
(Refer to Body (Interior and Exterior) - "Front Bumper Assembly")
|
| 2. |
Recover the refrigerant with a recovery/charging station.
|
| 3. |
Loosen the mounting nuts and separate the suction line (A), discharge
line (B).
|
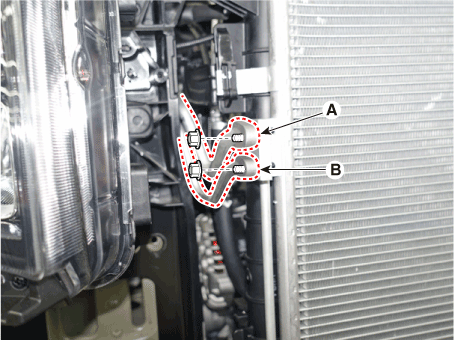
| 4. |
Loosen the mounting nuts, and then disconnect the discharge line (A)
and liquid line (B) from the condenser.
|
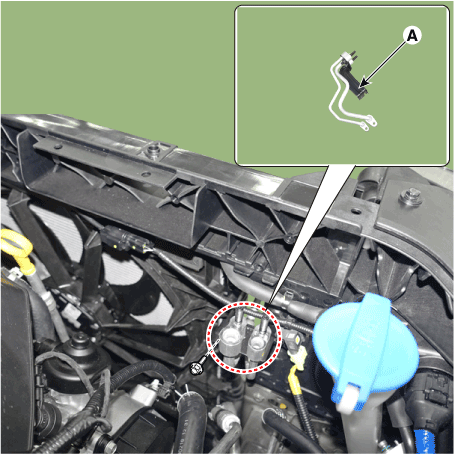
| 5. |
Loosen the mounting bolt, remove the refrigerant line (Condenser) (A).
|
| 6. |
Install in the reverse order of removal.
|
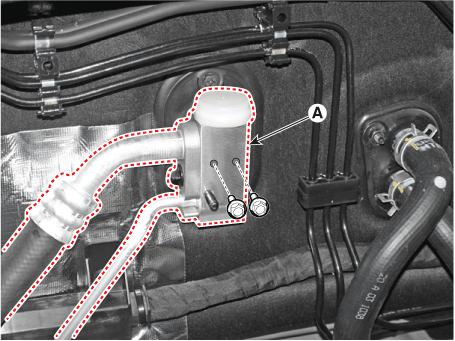
[Rear Suction & Liquid Pipe Assembly]
| 1. |
If a compressor is available, the air conditioner is operated for a
few minutes in the engine idle state and then the engine is stopped.
|
| 2. |
Disconnect the negative (-) battery terminal.
|
| 3. |
Recover the refrigerant with a recovery/charging station.
|
| 4. |
Remove the rear wheel guard [RH].
(Refer to Body - "Rear Wheel Guard")
|
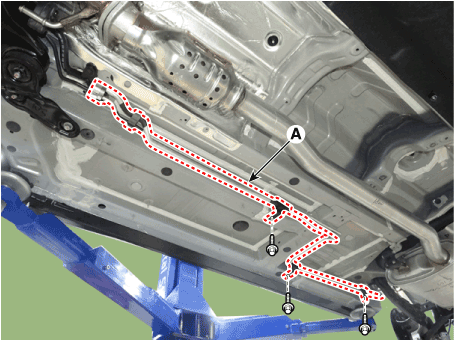
| 5. |
Loosen the mounting nuts and separate the suction line (A), discharge
line (B).
|
| 6. |
Loosen the mounting bolts , nuts and remove the engine roon under cover[RH].
|
| 7. |
Remove the refrigerant pipe line mounting nuts.
|
| 8. |
Loosen the mounting bolt and remove the Rear suction & Liquid pipe assembly
(A).
|
| 9. |
Install in the reverse order of removal.
|

 Compressor. Description and operation
Description
The compressor is the power unit of the A/C system.
It is located on the side of engine block and driven by a V-belt of the engine...
Other information:
Hyundai Santa Fe (TM) 2019-2025 Owner's Manual: System malfunction and limitations
System malfunction When Highway Driving Assist or Highway Lane Change function is not working properly, the ‘Check Highway Driving Assist (HDA) system’ (or 'Check HDA (Motorway Driving Assist) system') warning message will appear, and the warning light will illuminate on the cluster...
Hyundai Santa Fe (TM) 2019-2025 Service Manual: Seat Belt Buckle Switch (BS). Repair procedures
Removal 1. Disconnect the battery negative cable, and wait for at least three minutes before beginning work. 2. Remove the front seat assembly. (Refer to Body - "Front Seat Assembly") 3...
Categories
- Manuals Home
- 4th Generation Santa Fe Owners Manual
- 4th Generation Santa Fe Service Manual
- Repair procedures
- Head-up display settings
- Troubleshooting
- New on site
- Most important about car
Vehicle Identification Number (VIN). Vehicle certification label. Tire specification and pressure label
Vehicle Identification Number (VIN)
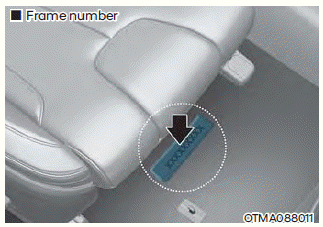
The vehicle identification number (VIN) is the number used in registering your vehicle and in all legal matters pertaining to its ownership, etc.
The number is punched on the floor under the passenger seat. To check the number, open the cover.

Copyright © 2025 www.hsafe4.com