Hyundai Santa Fe (TM): Rear Suspension System / Rear Lower Arm. Repair procedures
| Removal |
| 1. |
Loosen the wheel nuts slightly.
Raise the vehicle, and make sure it is securely supported.
|
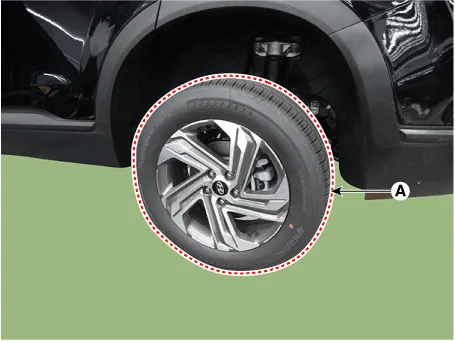
| 2. |
Remove the rear wheel and tire (A) from rear hub.
|

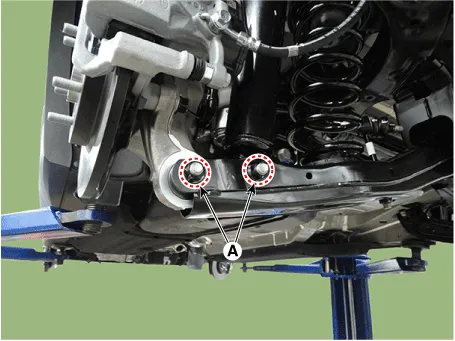
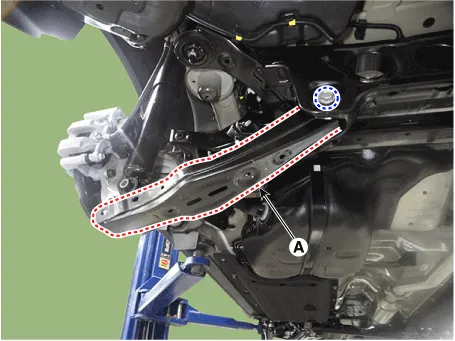
| 3. |
Remove the rear lower arm from the rear axle after loosening the mounting
bolts and nuts (A).
|
| 4. |
Remove the stabilizer bar link from the rear lower arm after loosening
the mounting nut (A).
|
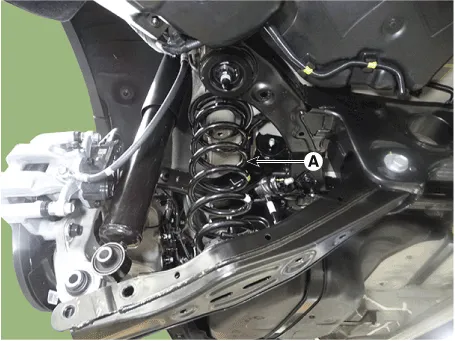
| 5. |
Remove the coil spring (A).
|
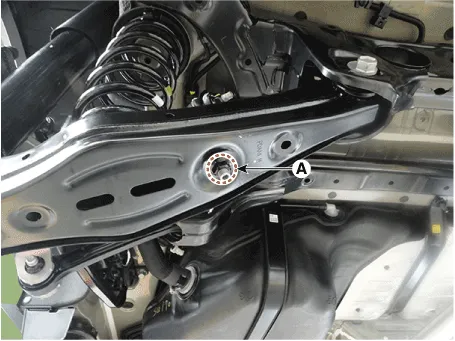
| 6. |
Remove the rear lower arm (A) after loosening the mounting bolt and
nut.
|
| Inspection |
| 1. |
Check the bushing for wear and deterioration.
|
| 2. |
Check the rear lower arm for deformation.
|
| 3. |
Check the coil spring and spring pad for deterioration and deformation.
|
| 4. |
Check for all bolts and nut.
|
| Installation |
| 1. |
To install, reverse the removal procedures.
|
| 2. |
Check the alignment.
(Refer to Suspension System - "Alingment")
|
Removal 1. Loosen the wheel nuts slightly. Raise the vehicle, and make sure it is securely supported. 2.
Removal 1. Loosen the wheel nuts slightly. Raise the vehicle, and make sure it is securely supported. 2.
Other information:
Hyundai Santa Fe (TM) 2019-2023 Service and Repair Manual: PTC Heater (Diesel only). Repair procedures
Inspection Operating Logic Test (Manual only) Inspect the PTC operation with the confirmation logic below : 1. Entering (1) Set the mode to FLOOR. (2) Set the temperature to MAX HOT.
Hyundai Santa Fe (TM) 2019-2023 Service and Repair Manual: Rear Heater Unit. Components and components location
Component Location 1. Rear Heater & A/C Unit Components 1. Rear heater & blower unit assembly 2. Blower motor assembly 3. Rear power mosfet 4. Duct seal guide 5.
Categories
- Manuals Home
- Hyundai Santa Fe Owners Manual
- Hyundai Santa Fe Service Manual
- Folding the side view mirror
- Driving your vehicle
- Body (Interior and Exterior)
- New on site
- Most important about car
