Hyundai Santa Fe (TM): Body (Interior and Exterior) / Hood
Repair procedures
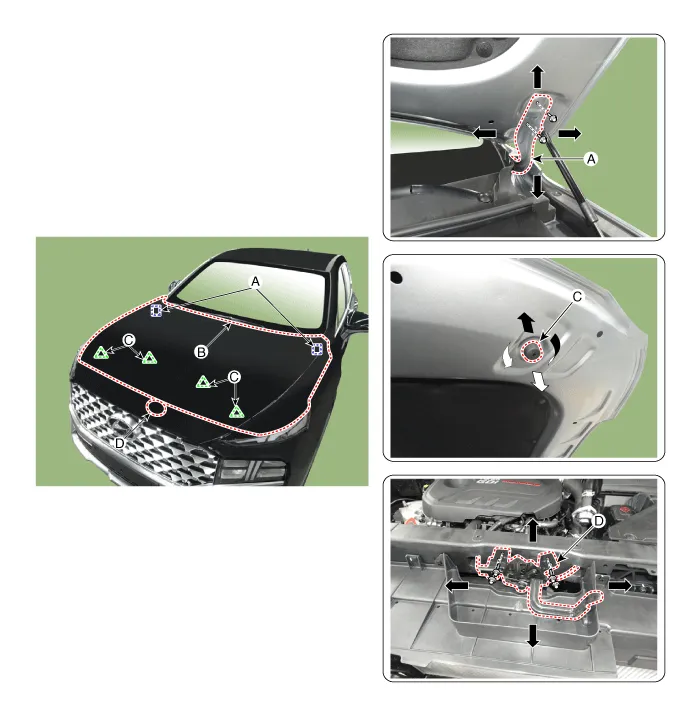
| Adjustment |
| 1. |
After loosening the hinge (A) mounting bolt, adjust the hood (B) by
moving it up and down or from side to side and tighten the bolt.
|
| 2. |
Adjust the hood height by moving the hood overslam bumpers (C) up and
down.
|
| 3. |
After loosening the hood latch (D) mounting bolts, adjust the latch
by moving it up and down or from side to side.
|
Hood Assembly. Components and components location
| Component Location |
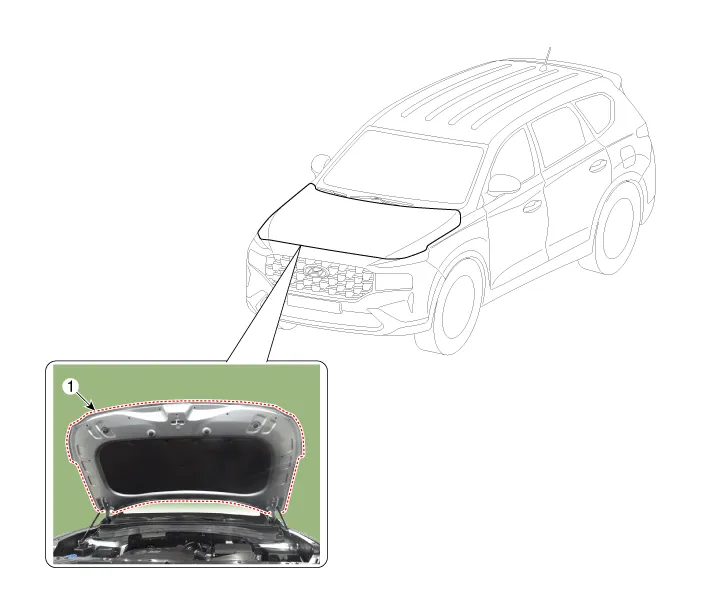
| 1. Hood assembly
|
Hood Assembly. Repair procedures
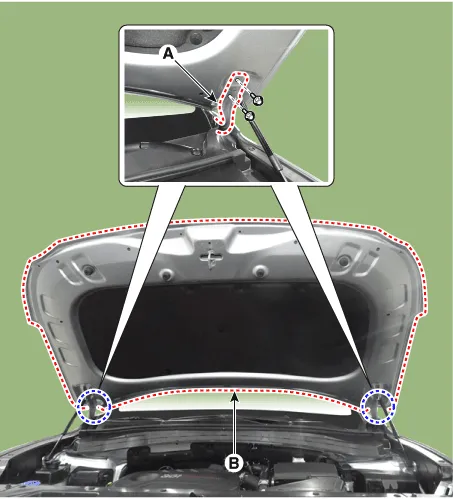
| Replacement |
|

|

| 1. |
After loosening the hood hinge (A) mounting bolts, remove the hood assembly
(B).
|
| 2. |
To install, reverse removal procedure.
|
Hood Insulator Pad. Repair procedures
| Replacement |
| 1. |
Using a clip remover, remove the clips and then the hood insulator pad
(A).
|
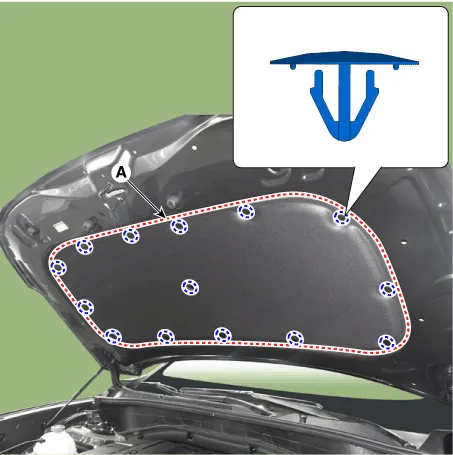
| 2. |
To install, reverse removal procedure.
|
Hood Lift. Repair procedures
| Replacement |
|
| 1. |
Using a screwdriver, lift the socket clips (A) up slightly on both ends
of the lifter (B).
|

| 2. |
Push the socket of the lifter into the bracket for installation.
|
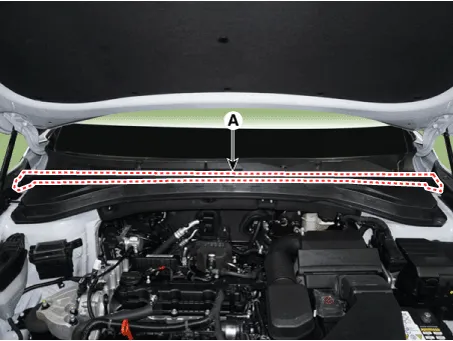
Hood Weatherstrip. Repair procedures
| Replacement |
| 1. |
Remove the hood weatherstrip (A).
|
| 2. |
To install, reverse removal procedure.
|
Hood Latch Release Handle. Components and components location
| Component Location |

| 1. Hood latch release handle |
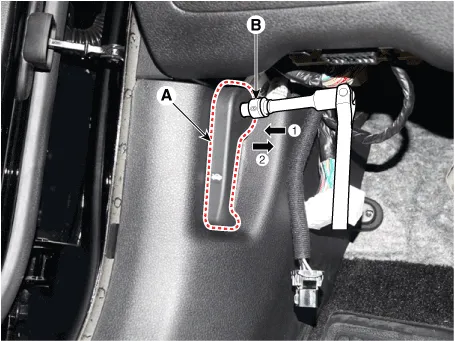
Hood Latch Release Handle. Repair procedures
| Replacement |
| 1. |
Using a socket (B), remove the hood release handle (A).
|
| 2. |
To install, reverse removal procedure.
|
Hood Latch. Components and components location
| Component Location |
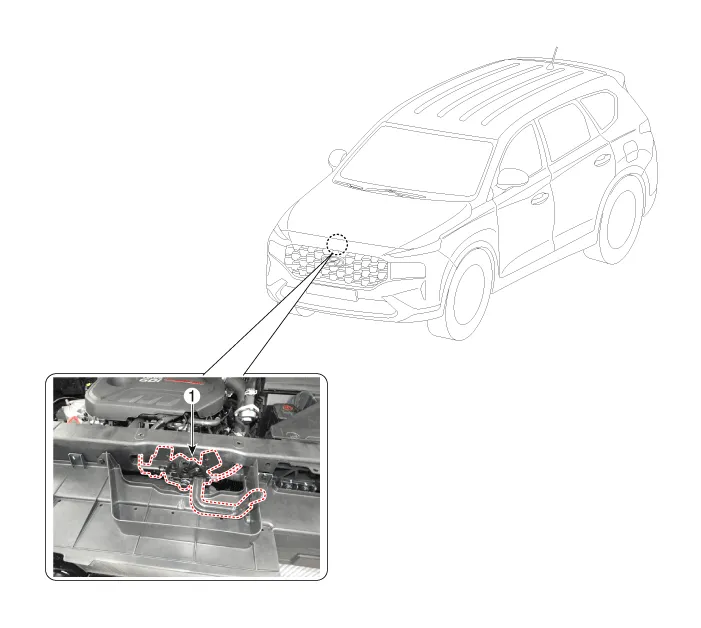
| 1. Hood Latch Assembly |
Hood Latch. Repair procedures
| Replacement |
| 1. |
Remove the front bumper assembly.
(Refer to Front Bumper - "Front Bumper Assembly")
|
| 2. |
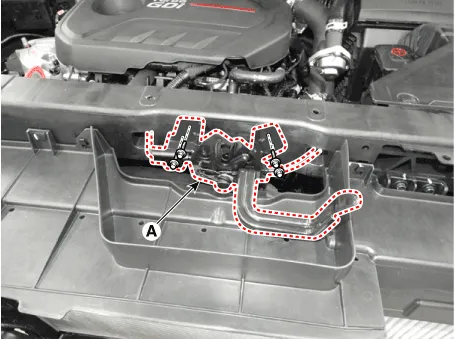
Press the rock pin to separate the hood latch connector (A) and disconnect
wiring clip.
|
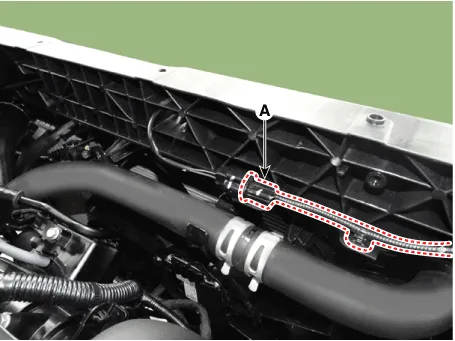
| 3. |
Loosen the mounting bolts and clip from the hood latch (A).
|
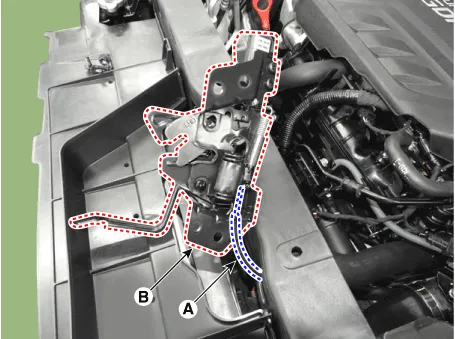
| 4. |
Remove the hood release handle cable (A) from the hood latch (B).
|
| 5. |
To install, reverse removal procedure.
|
Components and components location Component Location 1. Fender assembly Repair procedures Replacement • When removing the fender, wrap protective tape around a screwdriver or remover not to damage components • Put on gloves to prevent hand injuries • When removing the clips, use a clip remover.
Repair procedures Adjustment 1. Place the car on a flat surface and check whether the body and trunk lid are well-aligned.
Other information:
Hyundai Santa Fe (TM) 2019-2023 Service and Repair Manual: Power Tailgate Module
Description and operation Description Power tailgate is an electro-mechanical system designed to provide power opening and closing of the tailgate through the push of a button of a remote key (fob), console switch, inner switch or an outside handle switch of the tailgate.
Hyundai Santa Fe (TM) 2019-2023 Service and Repair Manual: A/C Pressure Transducer. Description and operation
Description The A/C Pressure Transducer (APT) converts the pressure value of high pressure line into voltage value after measuring it. By converted voltage value, engine ECU controls the cooling fan by operating it high speed or low speed.
Categories
- Manuals Home
- Hyundai Santa Fe Owners Manual
- Hyundai Santa Fe Service Manual
- Front Radar Unit. Repair procedures
- Parking Brake System. Electronic Parking Brake (EPB)
- Engine Control/Fuel System
- New on site
- Most important about car
