Hyundai Santa Fe (TM): Wireless Power Charger System / Wireless Charging Lamp. Repair procedures
Hyundai Santa Fe (TM) 2019-2023 Service and Repair Manual / Body Electrical System / Wireless Power Charger System / Wireless Charging Lamp. Repair procedures
| Removal |
Handling wireless charging system parts by wet hands may cause electric
shock.
|

| 1. |
Disconnect the negative (-) battery terminal.
|
| 2. |
Remove the console upper cover (A).
|
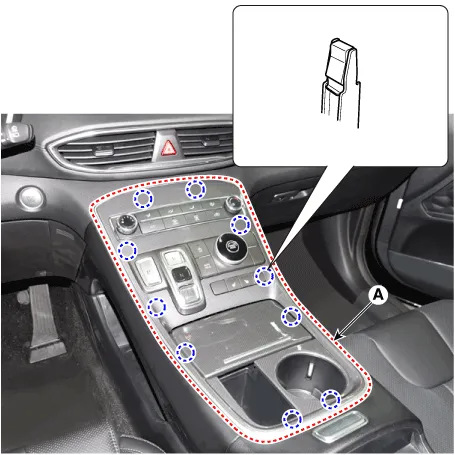
| 3. |
Press the lock pin, separate the connectors (A).
|

| 4. |
Remove the cup holder assembly (A) after loosening mounting screws.
|
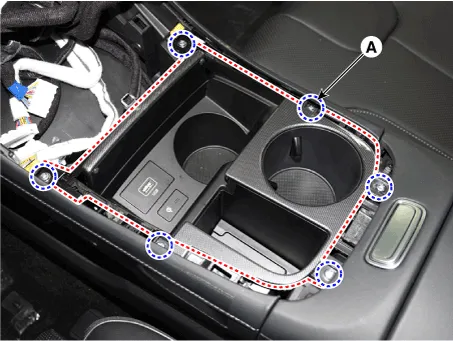
| 5. |
Disconnect WPC, USB, WPC lamp connectors.
|
| 6. |
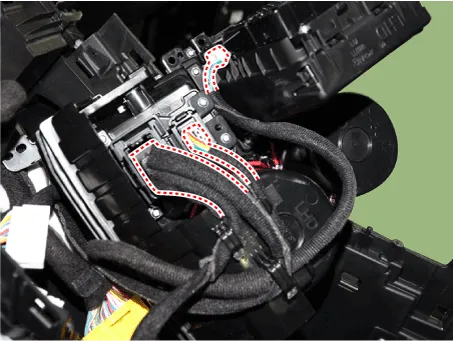
Remove the wireless charging lamp (A) by pushing the fixed clip in the
direction of the arrow as lillustration below
|

| Installation |
| 1. |
Install the wireless charging lamp.
|
| 2. |
Connect the wireless charging lamp connector.
|
| 3. |
Install the floor console upper cover assembly.
|
| 4. |
Connect the negative (-) battery terminal.
|
Other information:
Hyundai Santa Fe (TM) 2019-2023 Service and Repair Manual: Rear Blower Motor. Repair procedures
Replacement 1. Disconnect the negative (-) battery terminal. 2. Remove the luggage side trim [RH]. (Refer to Body - "Luggage Side Trim") 3. Separate the blower motor connector (A) and loosen the mounting screws and remove the
Hyundai Santa Fe (TM) 2019-2023 Service and Repair Manual: Heater & A/C Control Unit (DATC). Components and components location
Categories
- Manuals Home
- Hyundai Santa Fe Owners Manual
- Hyundai Santa Fe Service Manual
- Electronic Parking Brake (EPB) warning light. AUTO HOLD indicator light
- Vehicle Information, Consumer Information and Reporting Safety Defects
- Convenience features
- New on site
- Most important about car

Copyright © 2025 www.hsafe4.com - 0.0149