
Hyundai Santa Fe (TM): Motor Driven Power Steering / Steering Column and Shaft. Repair procedures
| Removal |
| 1. |
Turn the ignition switch OFF and disconnect the battery negative (-)
cable.
|
| 2. |
Turn the steering wheel so that the front wheels are placed in the straight
ahead position.
|
| 3. |
Remove the driver airbag module.
(Refer to Restraint - "Driver Airbag (DAB) Module and Clock Spring")
|
| 4. |
Remove the steering wheel.
(Referto Steering System - "Steering Wheel")
|
| 5. |
Remove the clock spring.
(Refer to Restraint - "Driver Airbag (DAB) Module and Clock Spring")
|
| 6. |
Remove the multifunction switch.
(Refer to Body Electrical System - "Multifunction switch")
|
| 7. |
Remove the steering column shroud lower panel
(Refer to Body - "Steering Column Shroud lower Panel")
|
| 8. |
Remove the crash pad lower pannel.
(Refer to Body - "Crash Pad Lower Pannel")
|
| 9. |
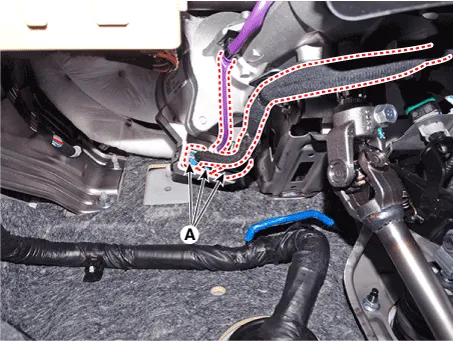
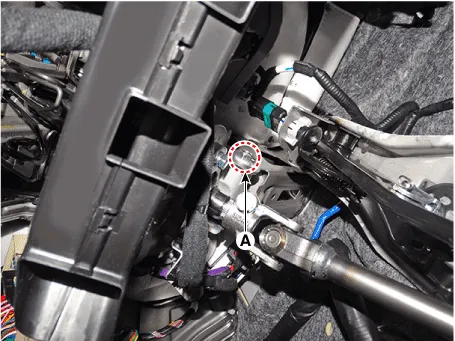
Disconnect the MDPS connector (A).
|

| 10. |
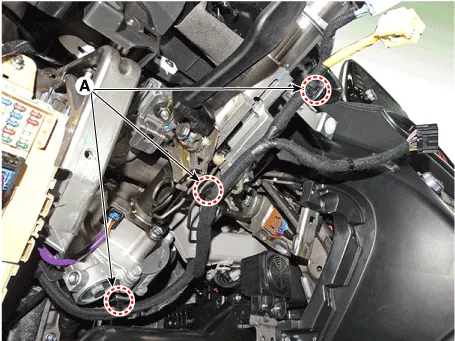
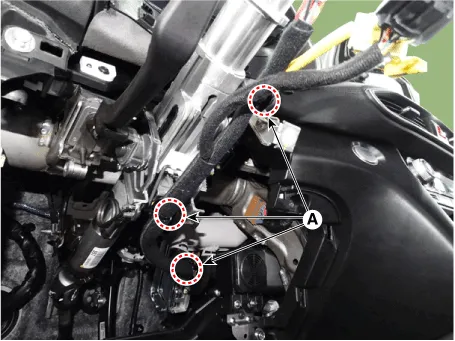
Remove the fixed clip (A) and then remove the wiring from the steering
column.
|
| 11. |
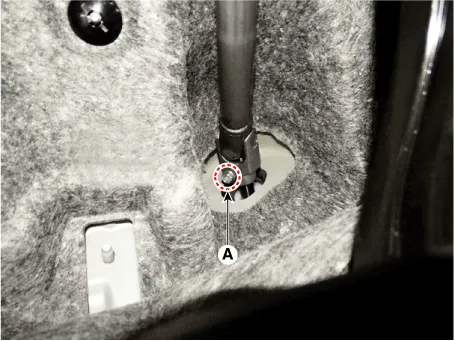
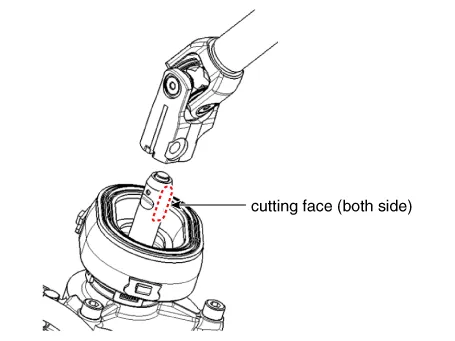
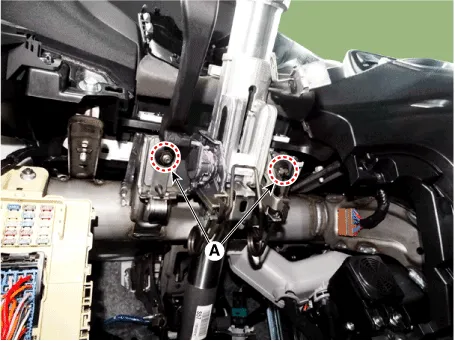
Loosen the bolt (A) and then disconnect the universal joint assembly
from the pinion of the steering gear box.
|

| 12. |
Remove the stop lamp switch.
(Refer to Brake System - "Stop Lamp Switch")
|
| 13. |
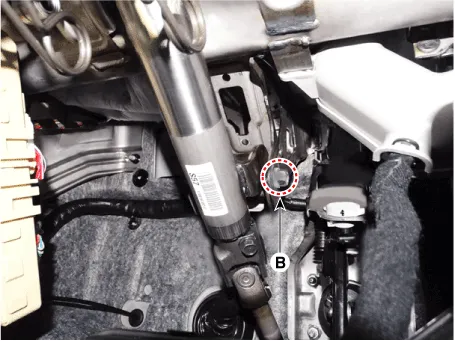
Remove the MDPS assembly by loosening the mounting nuts (A) and bolt
(B).
|

| 14. |
Install in the reverser order of removal.
|
| 15. |
Conduct the "EPS Type Recognition" by diagnostic tool.
(Refer to MDPS motor - "Diagnosis with diagnostic tool")
|
| 16. |
Conduct the "ASP Calibration" by diagnostic tool.
(Refer to MDPS motor - "Diagnosis with diagnostic tool")
|
| 1. |
Turn the steering wheel so that the front wheels are placed in the straight
ahead position.
|
| 2. |
Turn the ignition switch OFF and disconnect the battery negative (-)
cable.
|
| 3. |
Remove the driver airbag module.
(Refer to Restraint - "Driver Airbag (DAB) Module and Clock Spring")
|
| 4. |
Remove the steering wheel.
(Referto Steering System - "Steering Wheel")
|
| 5. |
Remove the clock spring.
(Refer to Restraint - "Driver Airbag (DAB) Module and Clock Spring")
|
| 6. |
Remove the multifunction switch.
(Refer to Body Electrical System - "Multifunction switch")
|
| 7. |
Remove the steering column shroud lower panel
(Refer to Body - "Steering Column Shroud lower Panel")
|
| 8. |
Remove the crash pad lower pannel.
(Refer to Body - "Crash Pad Lower Pannel")
|
| 9. |
Remove the fixing clip (A) from the steering column.
|
| 10. |
Loosen the bolt (A) and then disconnect the universal joint assembly
from the pinion of the steering gear box.
|
| 11. |
Remove the stop lamp switch.
(Refer to Brake System - "Stop Lamp Switch")
|
| 12. |
Remove the MDPS assembly by loosening the mounting nuts (A) and bolt
(B).
|
| Disassembly |
| 1. |
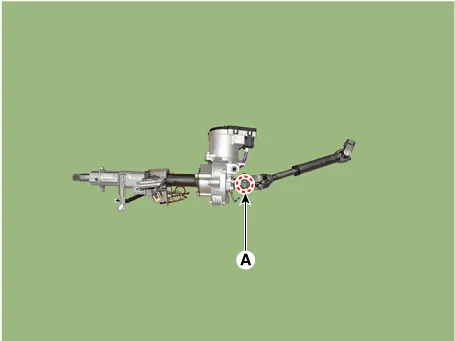
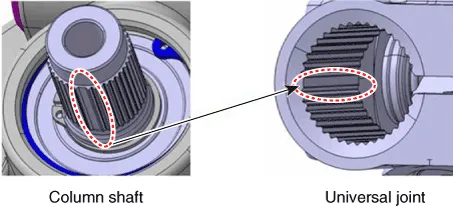
Loosen the bolt (A) and then disconnect the universal joint assembly
from the steering column assembly.
|
| 2. |
Reassembly is the reverse of the disassembly.
|
| Inspection |
| 1. |
Check the steering column for damage and deformation.
|
| 2. |
Check the steering column for damage and deformation.
|
| 3. |
Check the join bearing for damage and wear.
|
| 4. |
Check the tilt bracket for damage and cracks.
|
| 5. |
Check the key lock assembly for proper operation and replace it if necessary.
|
| Diagnosis with diagnostic tool |
| EPS Type Recognition |
|
| 1. |
Connect self-diagnosis connector(16pins) located in the lower of driver
side crash pad to self-diagnosis device.
|
| 2. |
Turn the self-diagnosis device after key is ON.
|
| 3. |
Turn the steering wheel to straight ahead position.
|
| 4. |
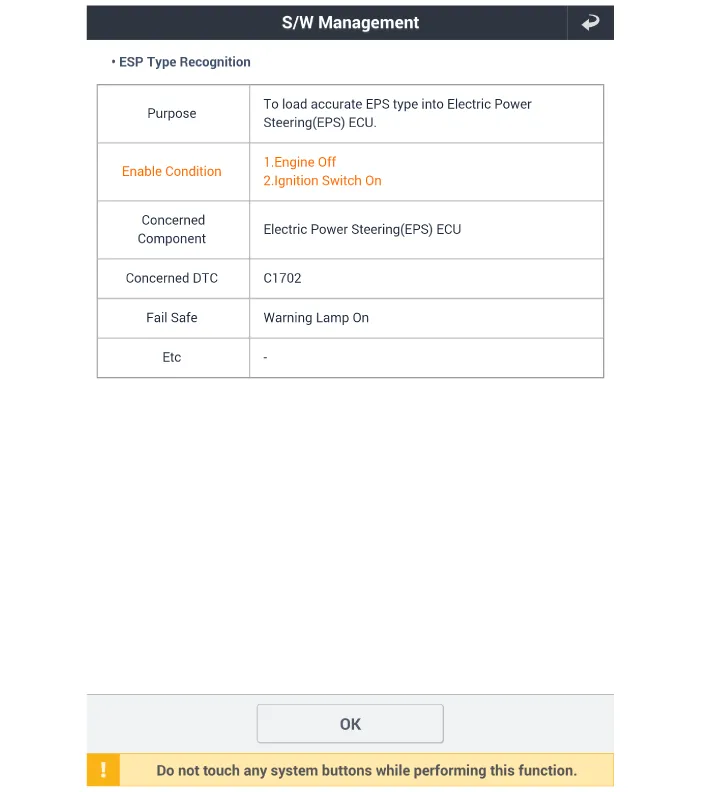
After Selecting the "vehicle model" and "system", select the "EPS Type
Recognition" on diagnostic tool vehicle selection screen.
|

| 5. |
Remove the DTC.
|
| 6. |
Turn off the IG switch and wait for 20 seconds or more before starting
the engine. And then make sure that MDPS works properly.
SAS Calibration
|
| 1. |
Connect self - diagnosis connector (16pins) located in the lower of
driver side crash pad to self - diagnosis device.
|
| 2. |
Turn the self - diagnosis device after key is ON.
|
| 3. |
Turn the steering wheel to straight ahead position.
|
| 4. |
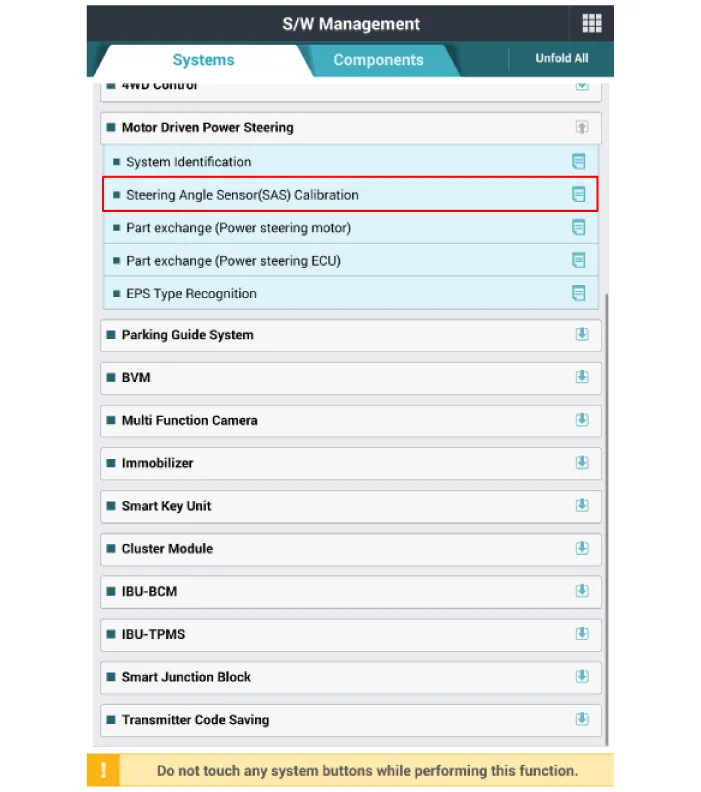
After Selecting the "vehicle model" and "system", select the "SAS Calibration"
on diagnostic tool vehicle selection screen.
|
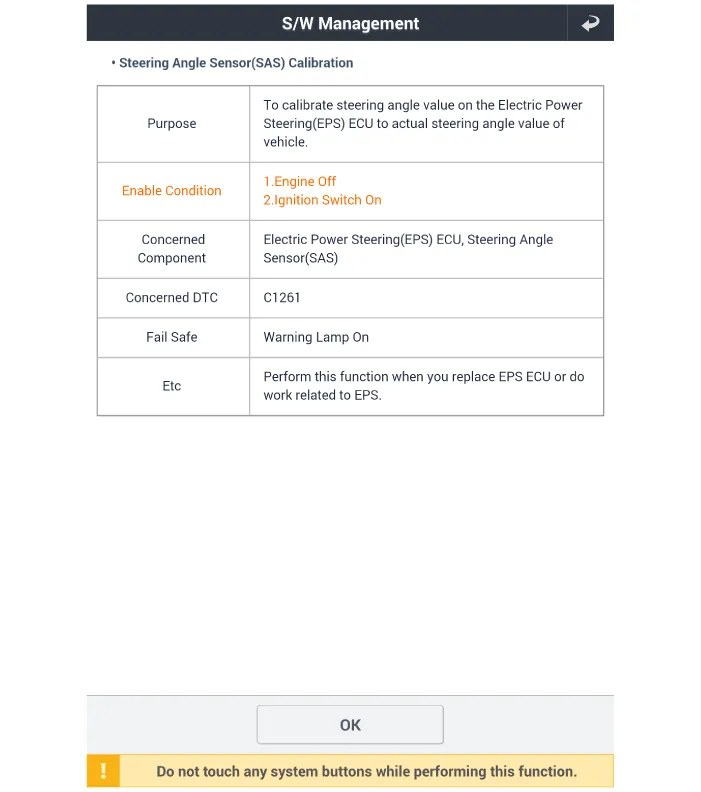
| 5. |
Remove the DTC.
|
| 6. |
Turn off the IG switch and wait for 10 seconds or more before starting
the engine. And then make sure that MDPS works properly.
|
| Installation |
| 1. |
To install, reverse the removal procedures.
|
| 2. |
Check the alignment.
(Refer to Suspension System - "Alingment")
|
Replacement 1. Turn the ignition switch OFF and disconnect the battery negative (-) cable. 2.
Components [R-MDPS] 1. Tie rod end 2. Lead wire 3. Short gear 4. Power pack [C-MDPS] 1.
Other information:
Hyundai Santa Fe (TM) 2019-2023 Service and Repair Manual: Compressor. Repair procedures
Removal 1. If a compressor is available, the air conditioner is operated for a few minutes in the engine idle state and then the engine is stopped. 2. Disconnect the negative (-) battery terminal.
Hyundai Santa Fe (TM) 2019-2023 Service and Repair Manual: A/C Pressure Transducer. Description and operation
Description The A/C Pressure Transducer (APT) converts the pressure value of high pressure line into voltage value after measuring it. By converted voltage value, engine ECU controls the cooling fan by operating it high speed or low speed.
Categories
- Manuals Home
- Hyundai Santa Fe Owners Manual
- Hyundai Santa Fe Service Manual
- 4 Wheel Drive (4WD) System
- Rear seats
- Troubleshooting
- New on site
- Most important about car
