Hyundai Santa Fe (TM): Automatic Transaxle Control System / Shift Cable. Repair procedures
| Removal |
| 1. |
Make sure vehicle does not roll before setting shift lever to "N" position.
|
| 2. |
Turn ignition switch OFF and disconnect the negative (-) battery cable.
|
| 3. |
Remove the air cleaner assembly and air duct.
(Refer to Engine Mechanical System - "Air Cleaner")
|
| 4. |
Remove the battery and battery tray.
(Refer to Engine Electrical System - "Battery")
|
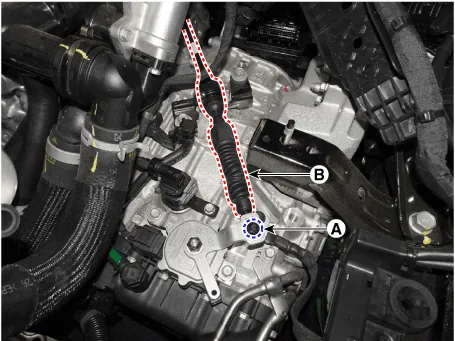
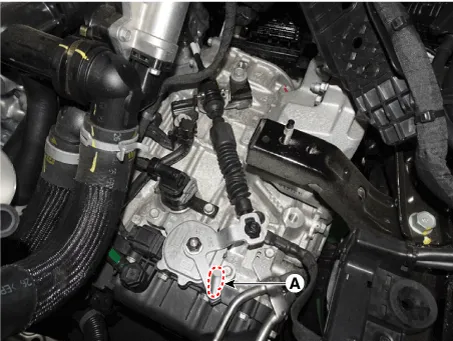
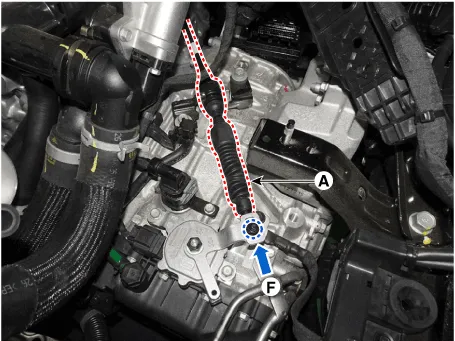
| 5. |
Loosen the nut (A) and then separate the shift cable (B).
|
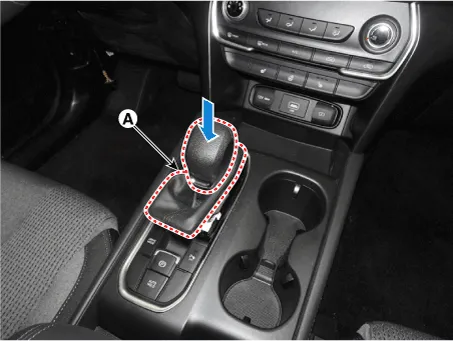
| 6. |
Remove the shift knob & boots.
|
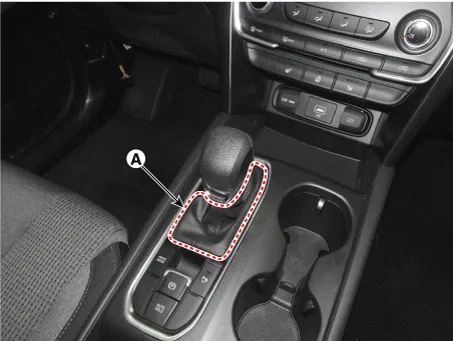

| 7. |
Remove the floor console assembly.
(Refer to Body - "Floor Console")
|
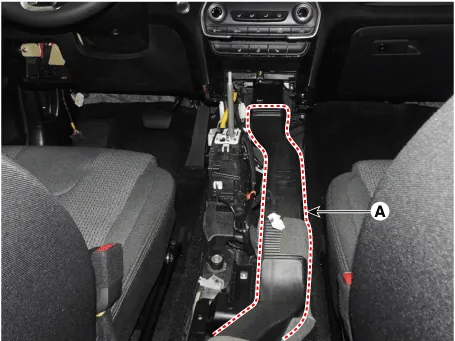
| 8. |
Remove the floor console air duct (A).
|
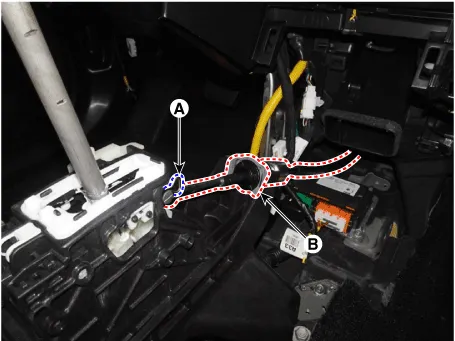
| 9. |
Remove the snap pin (A) and then separate the shift cable (B).
|
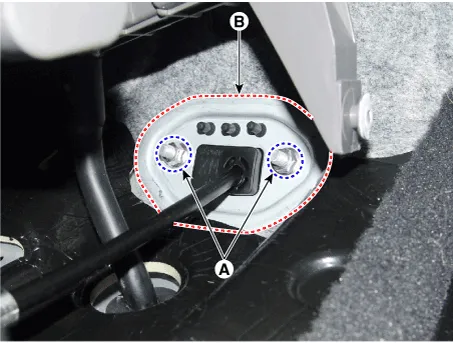
| 10. |
Loosen the nuts (A) and then removing the shift cable retainer (B).
|
| 11. |
Remove the shift cable by pulling it toward the interior.
|
| Installation |
| 1. |
Install the cable retainer (B) and then tightening the nuts (A).
|

| 2. |
Install the shift cable (B) in the shift lever and then install the
snap pin (A).
|


| 3. |
Install the floor console air duct (A).
|
| 4. |
Install the shift knob & boots (A).
|
| 5. |
Insert the shift cable (B) and then lightly tighten the nut (A).
|
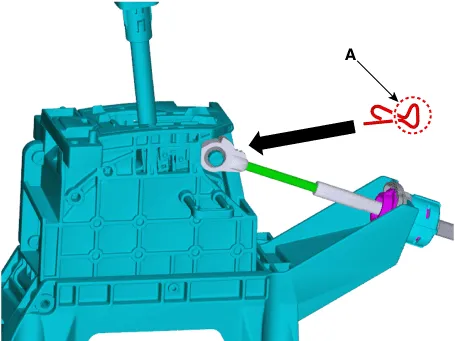
| 6. |
Align the hole in the manual control lever with the "N" position hole
of the position switch and then insert the position switch guide pin
(SST No.: 09480-A3800) (A).
|
| 7. |
Push shift cable (A) lightly to "F" direction shown to eliminate free
play of shift cable.
|
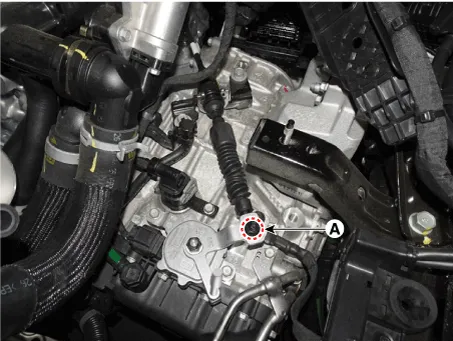
| 8. |
Tighten the nut (A) with the specified torque.
|
| 9. |
Remove the position switch guide pin (SST No. : 09480 - A3800) (A) from
the hole.
|
| 10. |
Install the battery and tray.
(Refer to Engine Electical System - "Battery" )
|
| 11. |
Install the air cleaner assembly and air duct.
(Refer to Engine Mechanical System - "Air Cleaner")
|
Removal 1. Turn ignition switch OFF and disconnect the negative (-) battery cable. 2. Remove the shift knob & boots.
Other information:
Hyundai Santa Fe (TM) 2019-2023 Service and Repair Manual: Description and operation
Description The SMART KEY system is a system that allows the user to access and operate a vehicle in a very convenient way. To access the vehicle, no traditional key or remote control unit is needed. The user carries a SMART KEY FOB which does not require any conscious actions by the user (e.
Hyundai Santa Fe (TM) 2019-2023 Service and Repair Manual: AC Inverter System
Description and operation Description An inverter is a device that transforms the DC voltage from the battery into an AC voltage (220 V). The inverter can power various electrical devices that consume 200 W or less, including mobile phone or notebook rechargers, audio systems, and TVs.
Categories
- Manuals Home
- Hyundai Santa Fe Owners Manual
- Hyundai Santa Fe Service Manual
- Troubleshooting
- Emission Control System
- Hydraulic System
- New on site
- Most important about car
