
Hyundai Santa Fe (TM): Driveshaft and axle / Propeller Shaft Assembly
Components and components location
| Components |
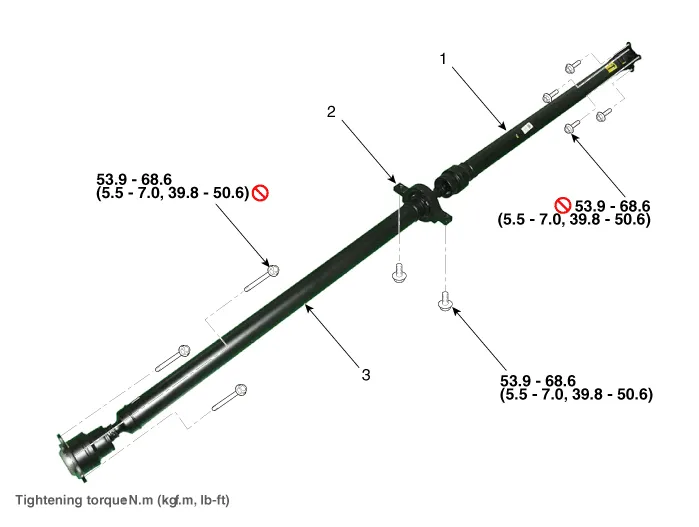
| 1. Front propeller
shaft 2. Center bearing bracket |
3. Rear propeller
shaft |
Repair procedures
| Removal |
|

| 1. |
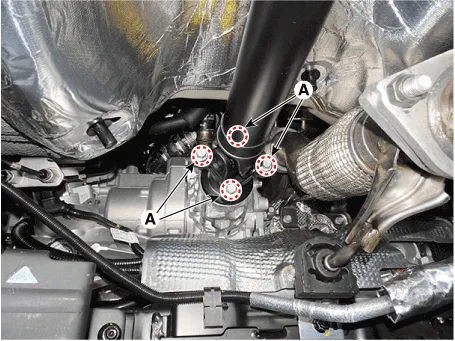
After making a match mark on the flange yoke and transaxle companion,
remove the propeller shaft mounting bolts (A).
|
| 2. |
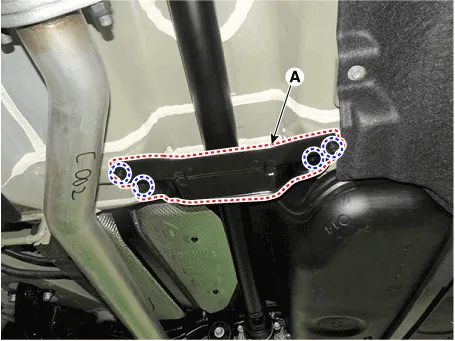
Remove the bracket (A) after loosening the mounting bolts.
|
| 3. |
Loosen the center bearing bracket mounting bolts (A).
|
| 4. |
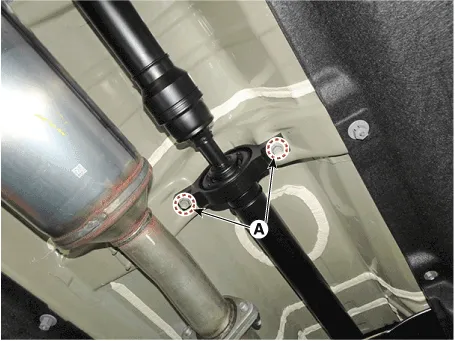
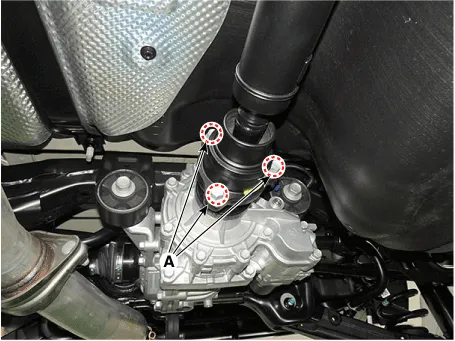
After making a match mark on the constant velocity joint and rear differential
companion, remove the propeller shaft mounting bolts (A).
|
| Installation |
| 1. |
To install, reverse the removal procedures.
|
Components and components location Components 1. Rear drive shaft (left) 2. Rear drive shaft (right) Repair procedures Removal • Be careful not to damage the parts located under the vehicle (floor under cover, fuel filter, fuel tank and canister) when raising the vehicle using the lift.
Components and components location Components Location 1. Rear differential carrier assembly 2. Rear driveshaft assembly 3.
Other information:
Hyundai Santa Fe (TM) 2019-2023 Service and Repair Manual: Smart key antenna. Repair procedures
Removal Interior 1 Antenna Take care not to scratch the crash pad and related parts. 1. Disconnect the negative (-) battery terminal.
Hyundai Santa Fe (TM) 2019-2023 Service and Repair Manual: Refrigerant Line. Components and components location
Categories
- Manuals Home
- Hyundai Santa Fe Owners Manual
- Hyundai Santa Fe Service Manual
- Battery. Specifications
- Emission Control System
- Identification Numbers
- New on site
- Most important about car
