Hyundai Santa Fe (TM): Charging System / Alternator. Repair procedures
| Removal |
|

| 1. |
Turn the ignition switch OFF and disconnect the battery (-) terminal.
|
| 2. |
Remove the drive belt.
(Refer to Engine Mechanical System - "Drive Belt")
|
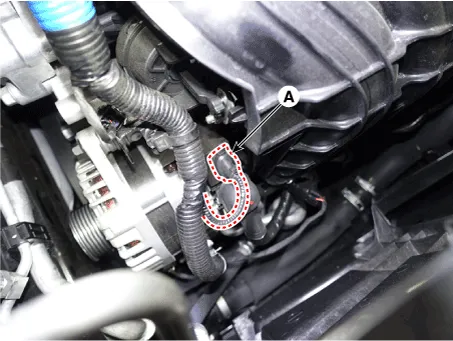
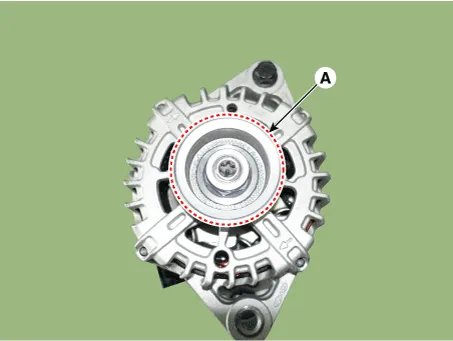
| 3. |
Disconnect the alternator connector (A).
|
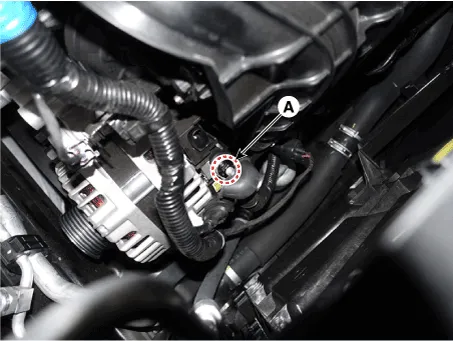
| 4. |
Remove the cable nut (A) from the alternator "B" terminal.
|
| 5. |
Remove the alternator mounting bolts.
|
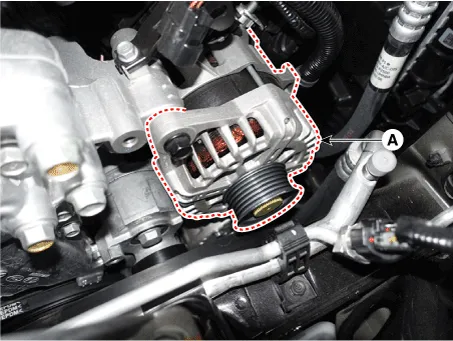
| 6. |
Remove the alternator (A).
|
| Installation |
| 1. |
Install in the reverse order of removal.
|
| Disassembly |
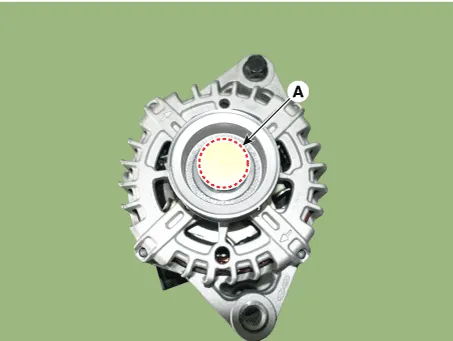
| 1. |
Remove the shaft cap (A).
|

| 2. |
Remove the OAP pulley (A).
|
| 3. |
Remove the alternator cover (A) after loosening the mounting nut.
|

| 4. |
Remove the regulator assembly (A).
|

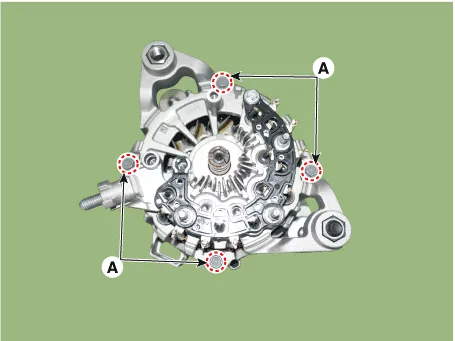
| 5. |
Remove the stator leads (A).
|
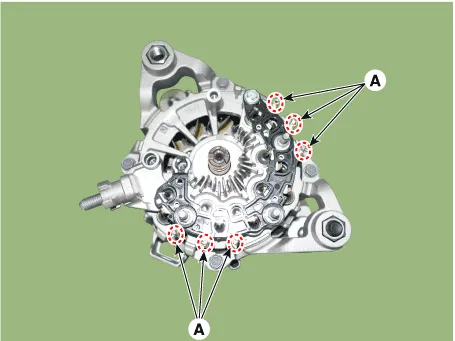
| 6. |
Remove the 4 through bolts (A).
|
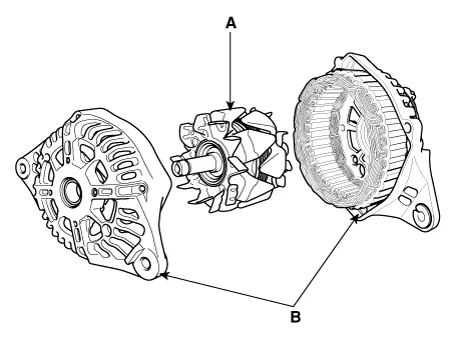
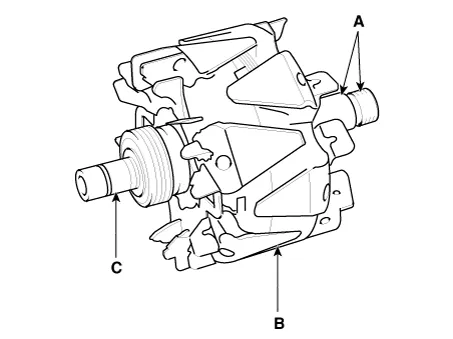
| 7. |
Separate the rotor (A) and cover (B).
|
| Reassembly |
| 1. |
Reassemble in the reverse order of disassembly.
|
| Inspection |
| 1. |
Check that there is continuity between the slip rings (C).
|
| 2. |
Check that there is no continuity between the slip rings and the rotor
(B) or rotor shaft (A).
|
| 3. |
If the rotor fails either continuity check, replace the alternator.
|
| 1. |
Check that there is continuity between each pair of leads (A).
|

| 2. |
Check that there is no continuity between each lead and the coil core.
|
| 3. |
If the coil fails either continuity check, replace the alternator.
|
Specification Item Specification Rated voltage 13.5V , 130A Speed in use 1,000 - 18,000rpm Pin 1 (LIN) Pulley Type OAP pulley
Description AGM Battery AGM battery is used for especially heavy load on the vehicle network depending on equipment and requirements.
Other information:
Hyundai Santa Fe (TM) 2019-2023 Service and Repair Manual: Components and components location
Component Location Index Engine Room 1. Service port (High pressure) 2. A/C pressure transducer (APT) 3. Service port (Low pressure) 4. Compressor 5. Suction & Liquid pipe assembly 6. Expansion valve Interior 1.
Hyundai Santa Fe (TM) 2019-2023 Service and Repair Manual: Parking Distance Warning (PDW)
Description and operation Description • PDW consists of 8 sensors (front : 4 units, rear : 4 units) that are used to detect obstacles and transmit the result in three separate warning levels, the first, second and third to IBU via LIN communication.
Categories
- Manuals Home
- Hyundai Santa Fe Owners Manual
- Hyundai Santa Fe Service Manual
- Electronic Parking Brake (EPB)
- Restraint
- 4 Wheel Drive (4WD) System
- New on site
- Most important about car
