Hyundai Santa Fe (TM): Timing System / Timing Chain Cover. Repair procedures
| Removal |
|

|
|

|

| 1. |
Disconnect the battery negative terminal.
|
| 2. |
Remove the engine cover.
(Refer to Engine and Transaxle Assembly - "Engine Cover")
|
| 3. |
Remove the RH front wheel.
(Refer to Suspension System - "Wheel")
|
| 4. |
Remove the engine room under cover.
(Refer to Engine and Transaxle Assembly - "Engine Room Under Cover")
|
| 5. |
Remove the cylinder head cover.
(Refer to Cylinder Head Assembly - "Cylinder Head Cover")
|
| 6. |
Remove the compressor.
(Refer to Heating, Ventilation Air conditioning - "Compressor")
|
| 7. |
Remove the A/C compressor bracket.
(Refer to Lubrication System - "Oil Pan")
|
| 8. |
Remove the oil pan.
(Refer to Lubrication System - "Oil Pan")
|
| 9. |
Remove the engine mounting bracket.
(Refer to Engine And Transaxle Assembly - "Engine Mounting")
|
| 10. |
Install the jack to the edge of ladder frame.
|
| 11. |
Remove the crankshaft damper pulley.
(Refer to Drive Belt System - "Crankshaft Damper Pulley")
|
| 12. |
Disconnect the engine ground cable (A).
|
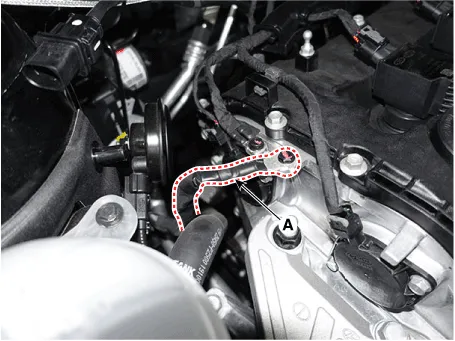
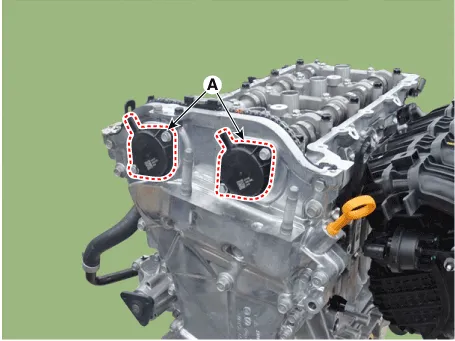
| 13. |
Remove the intake and exhaust variable force solenoid (VFS) valves (A).
|
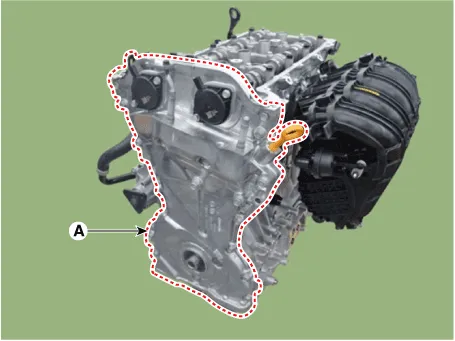
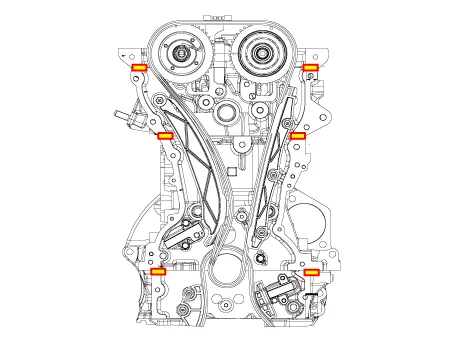
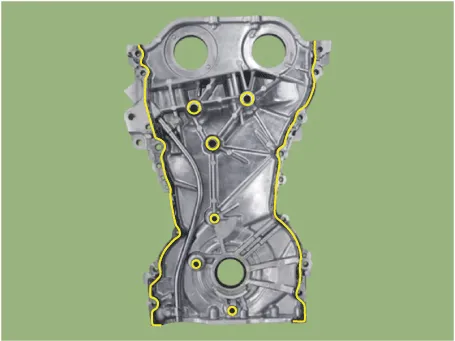
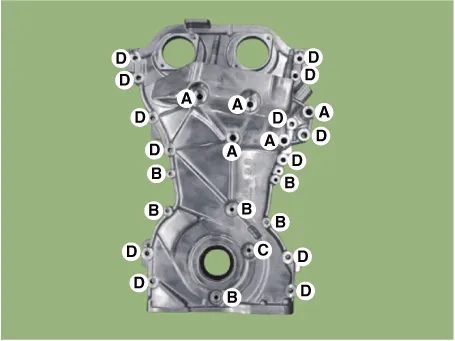
| 14. |
Remove the timing chain cover (A).
|
| Installation |
| 1. |
Install the timing chain cover.
|
| 2. |
Replace the front oil seal if necessary.
(Refer to Timing System - ŌĆ£Front Oil SealŌĆØ)
|
| 3. |
Install the other parts in the reverse order of removal.
|
Removal and Installation ŌĆó Be careful not to damage the parts located under the vehicle (floor under cover, fuel filter, fuel tank and canister) when raising the vehicle using the lift.
Removal ŌĆó Be careful not to damage the parts located under the vehicle (floor under cover, fuel filter, fuel tank and canister) when raising the vehicle using the lift.
Other information:
Hyundai Santa Fe (TM) 2019-2023 Service and Repair Manual: Temperature Control Actuator. Description and operation
Description The heater unit includes mode control actuator and temperature control actuator. The temperature control actuator is located at the heater unit. It regulates the temperature by the procedure as follows. Signal from control unit adjusts the position of the temperature door by operating the temperature switch
Hyundai Santa Fe (TM) 2019-2023 Service and Repair Manual: Troubleshooting
Trouble Symptom Charts Trouble Symptom 1 Trouble Symptom 2 Trouble symptom Probable cause Remedy The set vehicle speed varies greatly upward or downward "Surging" (repeated alternating acceleration and deceleration) occurs after set
Categories
- Manuals Home
- Hyundai Santa Fe Owners Manual
- Hyundai Santa Fe Service Manual
- Engine Electrical System
- Advanced Driver Assistance System (ADAS)
- Driving your vehicle
- New on site
- Most important about car
