Hyundai Santa Fe (TM): Front Door / Repair procedures
Hyundai Santa Fe (TM) 2019-2023 Service and Repair Manual / Body (Interior and Exterior) / Front Door / Repair procedures
| Adjustment |
Glass Adjustment
|

| 1. |
Remove the front door trim.
(Refer to Front Door - "Front Door Trim")
|
| 2. |
Remove the plug hole (A).
|
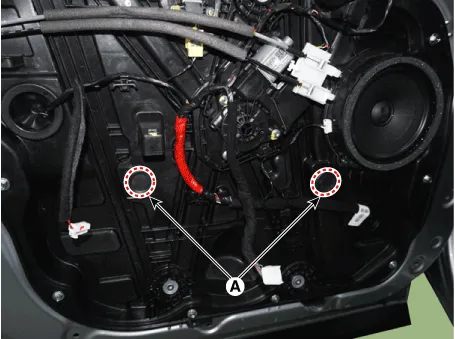
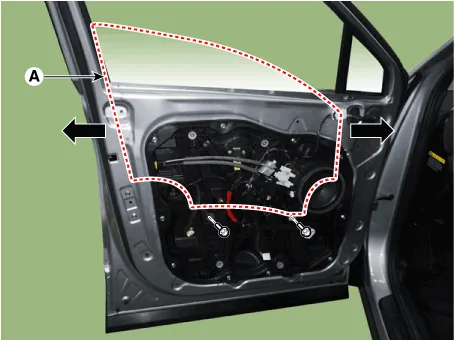
| 3. |
After loosening the glass mounting bolts, adjust the spacing of the
glass (A) by moving the glass from side to side and then tighten the
bolts.
|
| 4. |
Check the glass for normal operation.
|
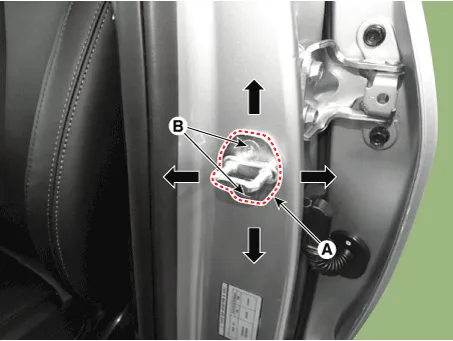
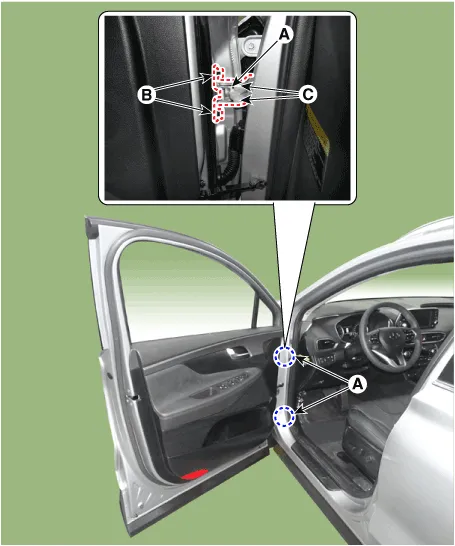
Door Striker Adjustment
|
| 1. |
After loosening the mounting screw, adjust the striker (A) by moving
it forward and backward or from side to side and then tighten the bolts
(B).
|
| 2. |
Check that door opening and closing works properly.
|
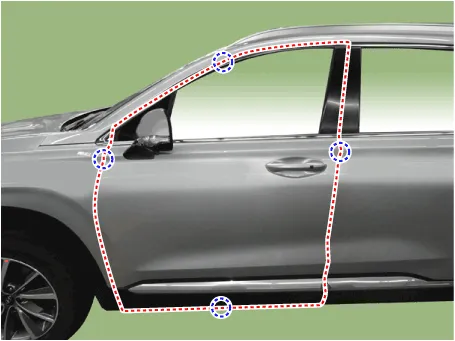
Door Position Adjustment
|
| 1. |
Check that the door and body edges are parallel.
|
| 2. |
Place the vehicle on a level surface before adjusting the doors.
|
| 3. |
Adjust the hinges (A) :
|
| 4. |
Grease the pivot portions of the hinges indicated.
|
| 5. |
Check for water leaks.
|
Components 1. Front door window glass 2. Front door window glass run assembly 3. Front door outside handle 4.
Component Location 1. Front Door Trim
Other information:
Hyundai Santa Fe (TM) 2019-2023 Service and Repair Manual: Blower Unit. Repair procedures
Replacement 1. Disconnect the negative (-) battery terminal. 2. Recover the refrigerant with a recovery/recycling/charging station. 3. When the engine is cool, drain the engine coolant from the radiator.
Hyundai Santa Fe (TM) 2019-2023 Service and Repair Manual: Warning Indicator. Components and components location
Categories
- Manuals Home
- Hyundai Santa Fe Owners Manual
- Hyundai Santa Fe Service Manual
- Driver assistance system
- Rear seats
- Rear Bumper Assembly. Repair procedures
- New on site
- Most important about car

Copyright © 2025 www.hsafe4.com - 0.0118