Hyundai Santa Fe (TM): Cooling System / Water Temperature Control Assembly. Repair procedures
| Removal and Installation |
|

| 1. |
Disconnect the battery negative terminal.
|
| 2. |
Remove the engine room under cover.
(Refer to Engine and Transaxle Assembly - "Engine Room Under Cover")
|
| 3. |
Drain the coolant.
(Refer to Cooling System - "Coolant")
|
| 4. |
Remove the air duct and air cleaner assembly.
(Refer to Intake and Exhaust System - "Air Cleaner")
|
| 5. |
Remove the battery.
(Refer to Engine Electrical System - "Battery")
|
| 6. |
Remove the battery tray.
(Refer to Engine Electrical System - "Battery")
|
| 7. |
Disconnect the radiator upper hose (A).
|
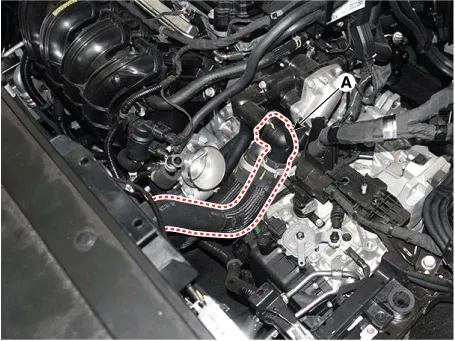
| 8. |
Disconnect the radiator lower hose (A).
|

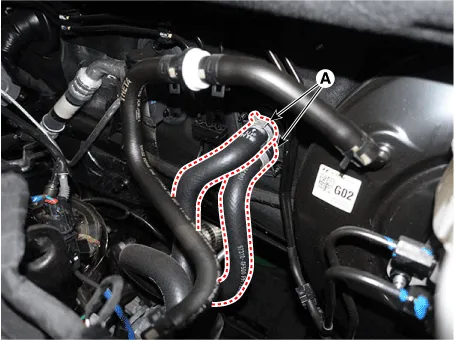
| 9. |
Disconnect the heater hoses (A).
|
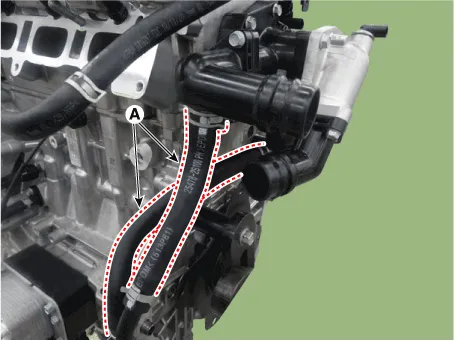
| 10. |
Disconnect the oil cooler hoses (A).
|
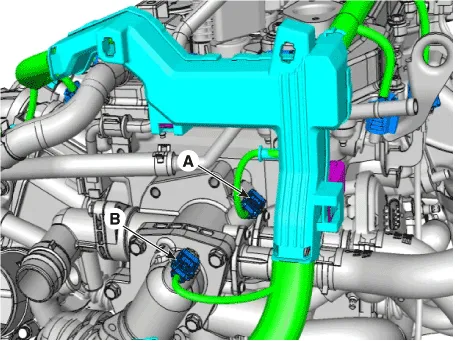
| 11. |
Disconnect the engine coolant temperature sensor connector (ECTS) (A)
and electric thermostat connector (B).
|
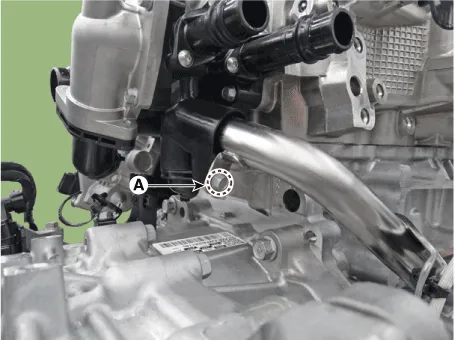
| 12. |
Remove the water pipe mounting bolt (A).
|
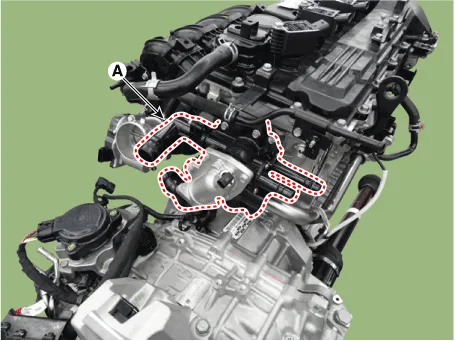
| 13. |
Remove the water temperature control assembly (A).
|
| 14. |
Install in the reverse order of removal.
|
| 15. |
Fill with engine coolant.
(Refer to Cooling System - "Coolant")
|
| 16. |
Start engine and check for leaks.
|
Removal and Installation 1. Remove the reservoir tank. (1) Disconnect the water hose (A).
Removal and Installation • Be careful not to damage the parts located under the vehicle (floor under cover, fuel filter, fuel tank and canister) when raising the vehicle using the lift.
Other information:
Hyundai Santa Fe (TM) 2019-2023 Service and Repair Manual: Blower Unit. Components and components location
Components Location 1. Blower unit assembly Components 1. Blower unit assembly 2. Inlet case [LH] 3. Inlet seal 4. Inlet case [RH] 5. Intake actuator 6.
Hyundai Santa Fe (TM) 2019-2023 Service and Repair Manual: Rear Power Mosfet. Repair procedures
Inspection 1. Turn the ignition switch ON. 2. Manually operate the control switch and measure the voltage of the blower motor. 3. Select the control switch to raise the voltage until it reaches high speed.
Categories
- Manuals Home
- Hyundai Santa Fe Owners Manual
- Hyundai Santa Fe Service Manual
- Description and operation
- Rear Bumper Assembly. Repair procedures
- Heating,Ventilation And Air Conditioning
- New on site
- Most important about car
