Hyundai Santa Fe: Cylinder Head Assembly / Cylinder Head Cover. Repair procedures
Hyundai Santa Fe (TM) 2019-2025 Service Manual / Engine Mechanical System / Cylinder Head Assembly / Cylinder Head Cover. Repair procedures
| Removal |
| 1. |
Disconnect the battery negative terminal.
|
| 2. |
Remove the engine cover.
|

| 3. |
Disconnect the wiring connectors and harness clamps and remove the connector
brackets around the cylinder head cover.
|
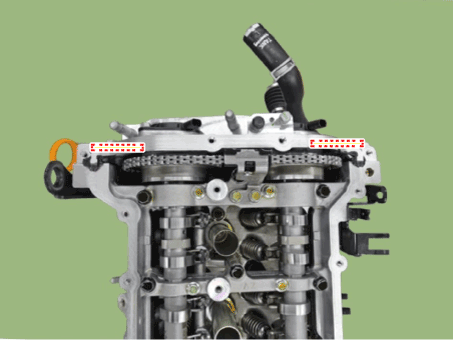
| 4. |
Remove the ignition coils.
(Refer to Engine Electrical System - "Ignition Coil")
|
| 5. |
Disconnect the breather hose (A).
|
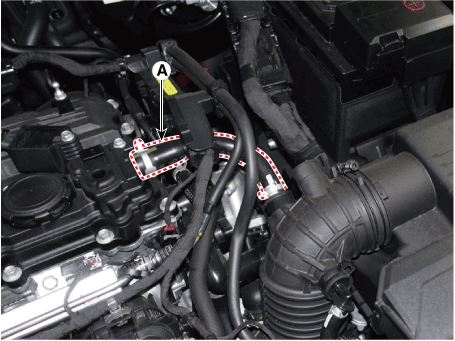
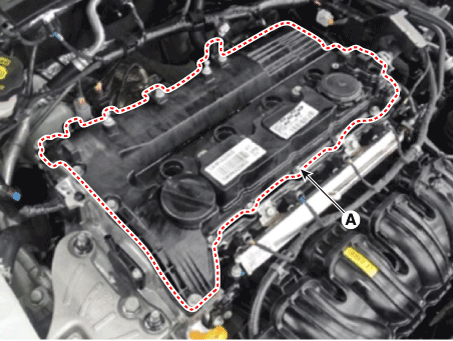
| 6. |
Remove the cylinder head cover (A).
|
| Installation |
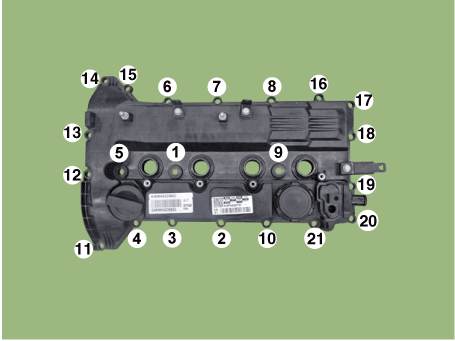
| 1. |
Install cylinder head cover.
|
| 2. |
Connect the breather hose (A).
|
| 3. |
Install the ignition coils.
(Refer to Engine Electrical System - "Ignition Coil")
|
| 4. |
Connect the wiring connectors and harness clamps and remove the connector
brackets around the cylinder head cover.
|
| 5. |
Installation is in the reverse order of removal.
|

 CVVT & Camshaft. Description and operation
Description
Continuous Variable Valve Timing (CVVT) system advances or retards the valve
timing of the intake and exhaust valve in accordance with the ECM control signal
which is calculated by the engine speed and load...
Other information:
Hyundai Santa Fe (TM) 2019-2025 Service Manual: Seat Heater (Non-Air Ventilation). Schematic diagrams
..
Hyundai Santa Fe (TM) 2019-2025 Owner's Manual: Calibrating the Battery Sensor
[A] : Battery sensor 1. Turn off the engine. 2. Disconnect all electronic devices that were additionally installed after the vehicle was delivered, such as navigation, dashcam, etc. 3. After 4 hours with the engine off, turn the engine on and off 3 to 4 times...
Categories
- Manuals Home
- 4th Generation Santa Fe Owners Manual
- 4th Generation Santa Fe Service Manual
- Child-protector rear door locks
- Power adjustment
- Resetting the power liftgate
- New on site
- Most important about car
Armrest
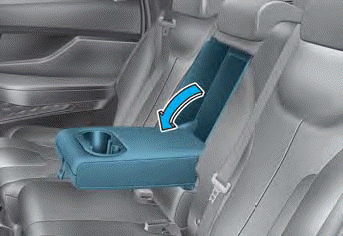
The armrest is located in the center of the rear seat. Pull the armrest down from the seatback to use it.

Copyright © 2025 www.hsafe4.com