Hyundai Santa Fe (TM): Hydraulic System / Valve Body. Repair procedures
Hyundai Santa Fe (TM) 2019-2023 Service and Repair Manual / Automatic Transaxle System (SBC) / Hydraulic System / Valve Body. Repair procedures
| Removal |
|

| 1. |
Turn ignition switch OFF and disconnect the negative (-) battery cable.
|
| 2. |
Remove the air duct and the air cleaner assembly.
(Refer to Engine Mechanical System - "Air Cleaner")
|
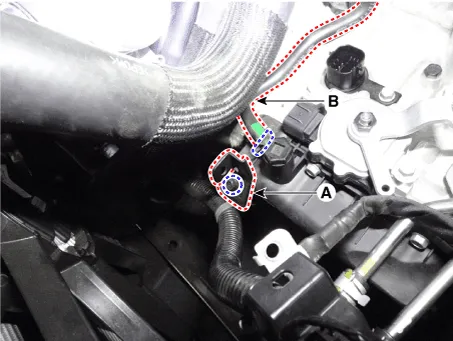
| 3. |
Separate the air bleed hose (B) and then wiring bracket (A).
|
| 4. |
Remove the under cover.
(Refer to Engine Mechanical System - "Engine Room Under Cover")
|
| 5. |
Remove the drain plug (A) and reinstall the drain plug after draining
ATF totally.
|

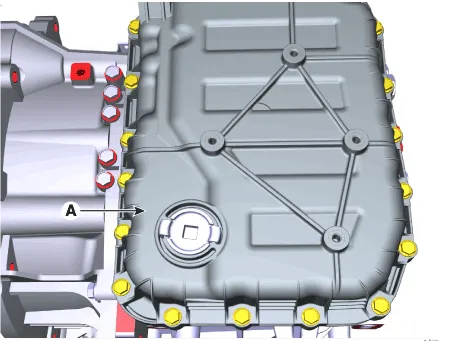
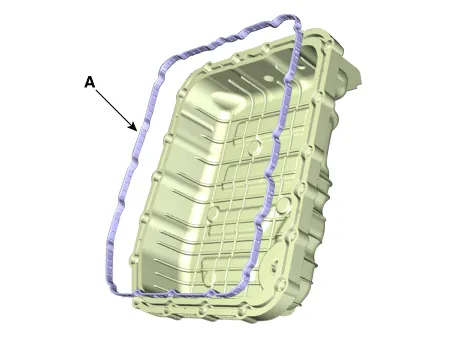
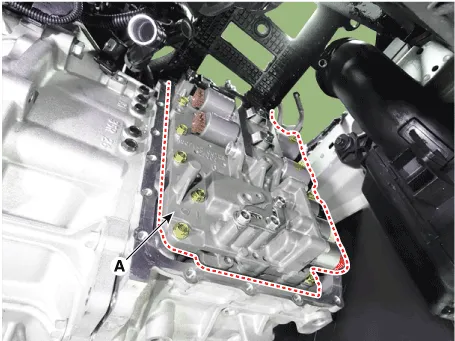
| 6. |
Loosen the mounting bolts (A) of the valve body cover.
|
| 7. |
Loosen the bolts and then removing the main harness (A).
|
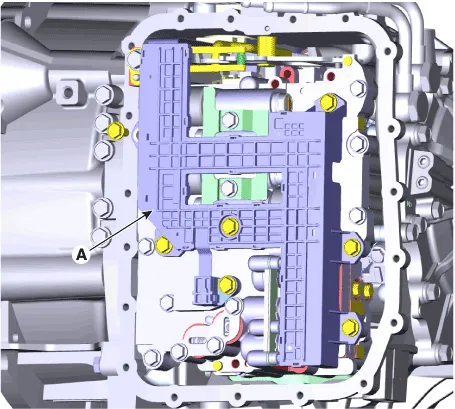
| 8. |
Loosen the mounting bolts and then removing the valve body assembly
(A).
|
| Installation |
| 1. |
To install, reverse the removal procedure.
|
| 2. |
Check the ATF level after refilling the automatic transaxle with fluid.
(Refer to Automatic Transaxle System - "Automatic Transaxle Fluid (ATF)"
)
|
| 3. |
Clear the diagnostic trouble codes (DTC) using the diagnostic tool.
(Refer to Automatic Transaxle System - "Automatic Transaxle System"
)
|
| 4. |
Reset the automatic transaxle adaptive values using the diagnostic tool.
|

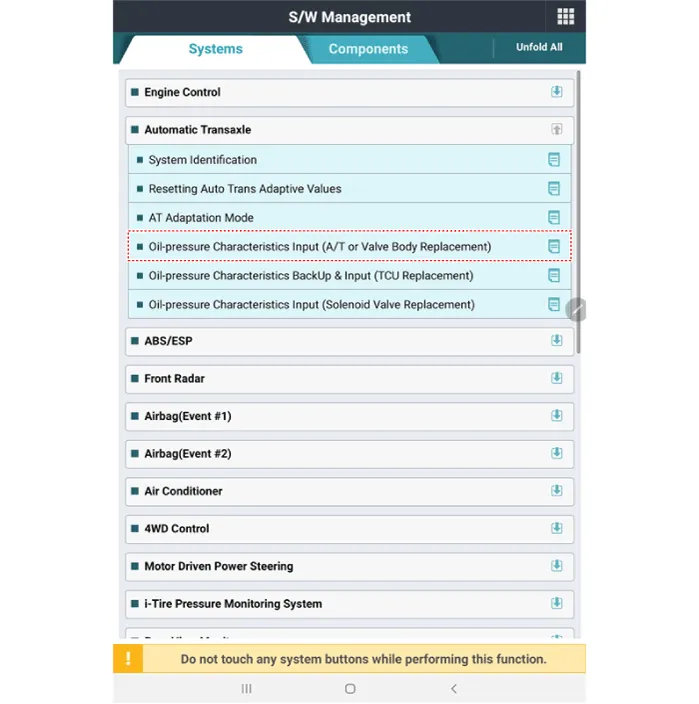
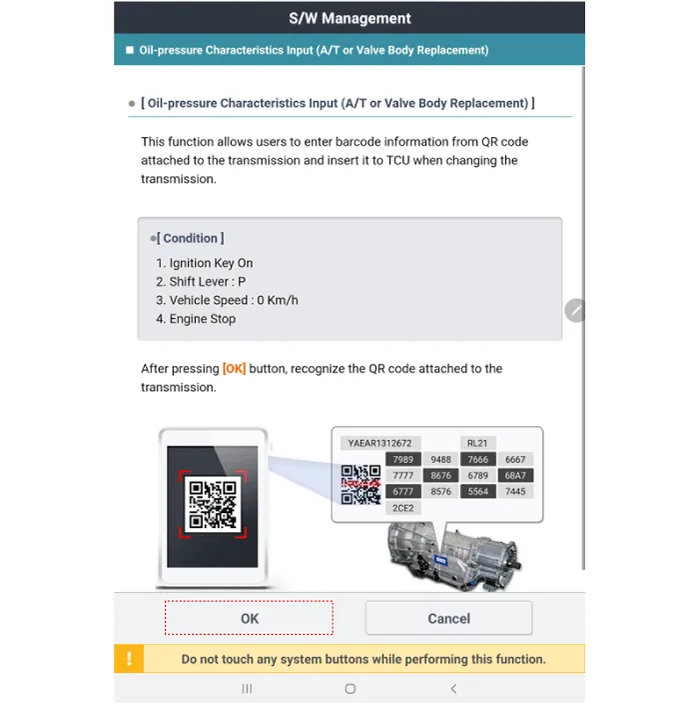
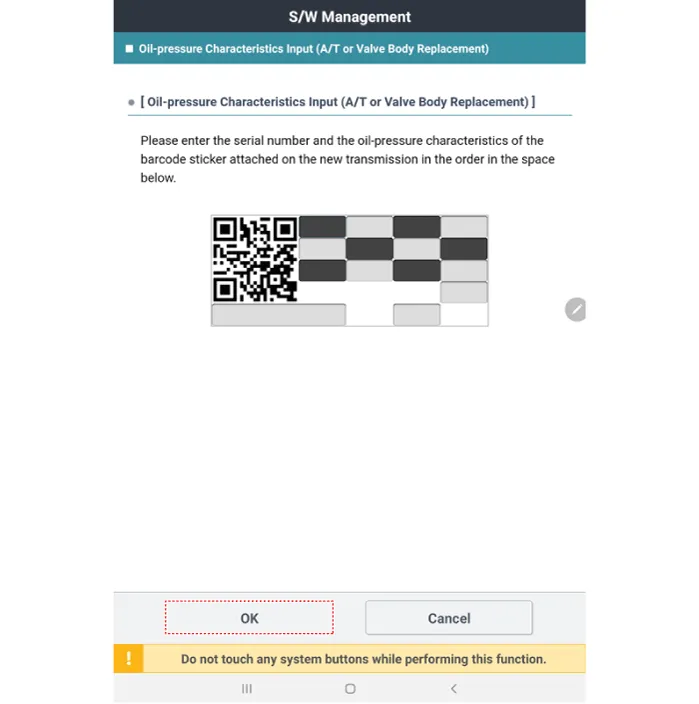
| 5. |
Perform the oil pressure characteristics input (A/T or valve body replacement)
procedure.
|
| 6. |
Record the bar code data (oil pressure characteristics) on the automatic
transaxle case or valve body and then input it manually onto the diagnostic
tool.
|
| 7. |
Perform the TCM adaptive values learning procedure.
(Refer to Automatic Transaxle Control System - "Repair procedures")
|
| 8. |
Be sure to check for leaks in each connection part when the engine is
started.
|
Components Location 1. Solenoid valve support bracket 2. Solenoid valve support bracket (Directly solenoid) 3. Line Pressure Control Solenoid Valve 4.
Description • Torque converter control solenoid valve (T/CON_VFS) is attached to the valve body. • This variable force solenoid valve indirectly controls the hydraulic pressure inside the torque converter.
Categories
- Manuals Home
- Hyundai Santa Fe Owners Manual
- Hyundai Santa Fe Service Manual
- Body Electrical System
- Front Radar Unit. Repair procedures
- Auto Hold. Warning messages
- New on site
- Most important about car

Copyright © 2026 www.hsafe4.com - 0.0249