Hyundai Santa Fe (TM): Body (Interior and Exterior) / Fender
Components and components location
| Component Location |

| 1. Fender assembly |
Repair procedures
| Replacement |
|

|

| 1. |
Remove the front bumper.
(Refer to Front Bumper - "Front Bumper Assembly")
|
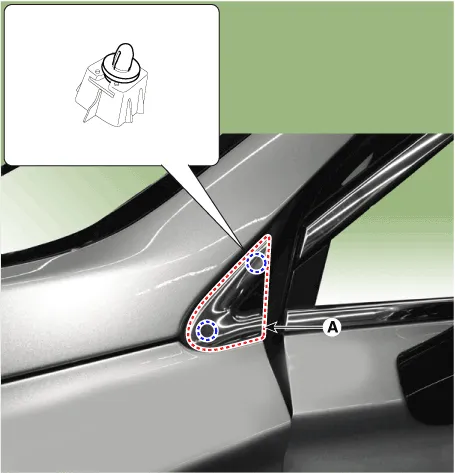
| 2. |
Loosen the mounting screws and then remove the front bumper side mounting
bracket (A).
|
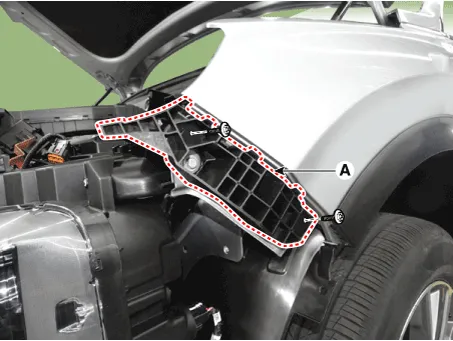
| 3. |
Remove the fender side cover (A).
|
| 4. |
Remove the DRL (Daytime Running Lights) assembly.
(Refer to Body Electrical System - "DRL (Daytime Running Lights)")
|
| 5. |
Remove the front wheel guard.
(Refer to Body Side Molding - "Front Wheel Guard")
|
| 6. |
Remove the fender garnish.
(Refer to Body Side Molding - "Fender Garnish.")
|
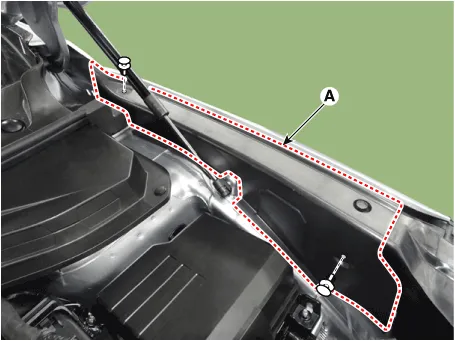
| 7. |
Using a screwdriver or remover, remove the delta garnish (A).
|
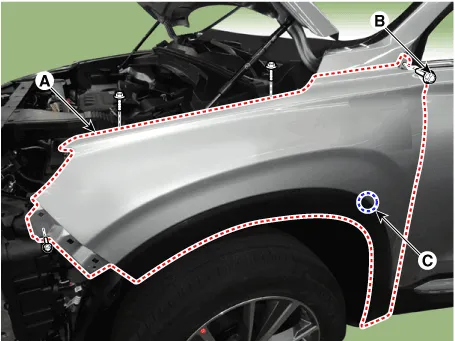
| 8. |
Loosen the mounting bolts remove the fender assembly (A).
|
| 9. |
To install, reverse removal procedure.
|
Special Service Tools Tool (Number and name) Illustration Use 09880 - 4F000 Hog ring clip installer Hog ring clip installation
Repair procedures Adjustment 1. After loosening the hinge (A) mounting bolt, adjust the hood (B) by moving it up and down or from side to side and tighten the bolt.
Other information:
Hyundai Santa Fe (TM) 2019-2023 Service and Repair Manual: In-car Sensor. Description and operation
Description The In-car air temperature sensor is built in the heater & A/C control unit. The sensor consists of a thermistor that measures the inside temperature. The signal decided by the resistance value that changes in accordance with perceived inside temperature, is delivered to heater control unit, and according t
Hyundai Santa Fe (TM) 2019-2023 Service and Repair Manual: Parking Distance Warning (PDW)
Description and operation Description • PDW consists of 8 sensors (front : 4 units, rear : 4 units) that are used to detect obstacles and transmit the result in three separate warning levels, the first, second and third to IBU via LIN communication.
Categories
- Manuals Home
- Hyundai Santa Fe Owners Manual
- Hyundai Santa Fe Service Manual
- Automatic Transaxle Control System
- Vehicle auto-shut off. System Operation
- Parking Brake System. Electronic Parking Brake (EPB)
- New on site
- Most important about car
