Hyundai Santa Fe (TM): Lubrication System / Oil Pump. Repair procedures
| Removal |
|

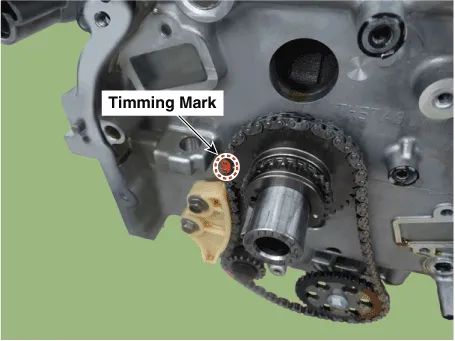
| 1. |
Remove the timing chain.
(Refer to Timing System - "Timing Chain")
|
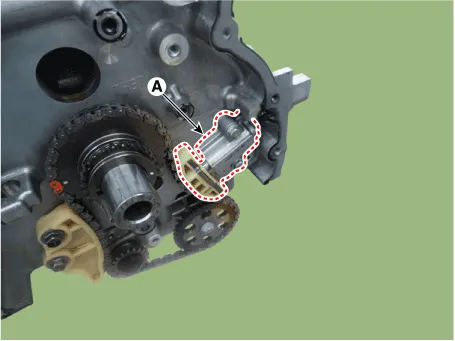
| 2. |
Remove the oil pump chain tensioner (A).
|
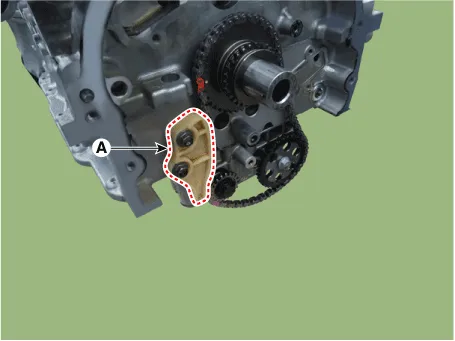
| 3. |
Remove the oil pump chain guide (A).
|
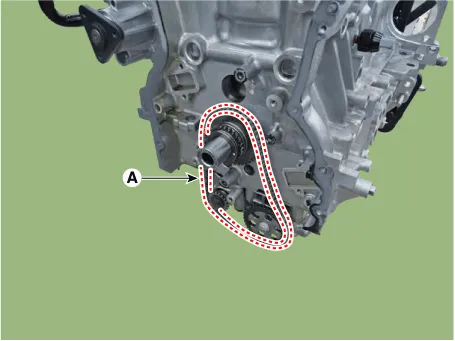
| 4. |
Remove the oil pump chain (A).
|
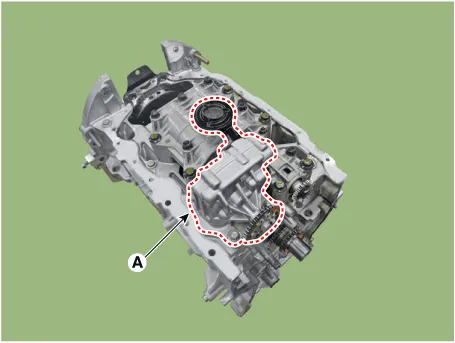
| 5. |
Remove the oil pump (A).
|
| Installation |
| 1. |
Install the oil pump (A).
|

| 2. |
Install the oil pump chain guide (A).
|
| 3. |
Install the oil pump chain (A).
|
| 4. |
Install the oil pump chain tensioner (A).
|
| 5. |
Install the timing chain.
(Refer to Timing System - "Timing Chain")
|
Removal • Be careful not to damage the parts located under the vehicle (floor under cover, fuel filter, fuel tank and canister) when raising the vehicle using the lift.
Removal • Be careful not to damage the parts located under the vehicle (floor under cover, fuel filter, fuel tank and canister) when raising the vehicle using the lift.
Other information:
Hyundai Santa Fe (TM) 2019-2023 Service and Repair Manual: Components and components location
Hyundai Santa Fe (TM) 2019-2023 Service and Repair Manual: Description and operation
Description Surround View Monitor (SVM) is the system that allows video monitoring of 360 degrees around the vehicle. The system includes 4 ultra optical camera mounted around the vehicle (front, both sides, rear). The video from these cameras are applied with distortion compensation, time point conversion, and video me